Article takeaways
- You don’t need a massive budget to make a serious impact. Each project featured here costs under $100 but delivers standout results that can totally transform a space.
- DIY isn’t just for the pros. From peel-and-stick backsplash to gallery walls and planter boxes, these approachable ideas are designed for beginners and renters alike.
- Small upgrades = big perceived value. Even a simple project like swapping cabinet hardware or refreshing your front door can dramatically boost your home’s visual appeal.
- Organization and storage are part of the process. Tools, leftover materials, and future project supplies need their own space, and self-storage can be your best-kept DIY secret.
- This is just the beginning. Stay tuned for the rest of the series, where we’ll explore even more impactful DIY projects under $250 and $500.
Sometimes, a little change is all you need to feel like you’re living in a brand-new home! Whether you’re renting a small apartment or finally tackling those “I’ll-do-it-later” projects you’ve been putting off, you don’t have to spend a fortune to make a big impact. The truth is, smart DIY projects under $100 can pack a massive punch, not just in how your home looks, but how it feels. Even small upgrades can create a very upscale, expensive, and modern-looking value when they’re done right.
This guide kicks off our DIY series with low-cost, high-reward projects for every skill level. These $100-and-under ideas are ideal for beginner DIYers, renters looking for temporary refreshes, and homeowners who want results without the renovation dust. You’ll get a mix of curb appeal boosters and interior upgrades, along with storage solutions to keep it all organized.
Pro Tip: If you’re short on space at home or want to keep your tools and materials safe during the process, self-storage can be a major asset, especially for multi-weekend projects or seasonal transitions.
Let’s dive into ten of our favorite upgrades that are easy on your wallet and heavy on charm.
Project #1: Paint Your Front Door for Maximum Curb Appeal ($55-95)

Your front door is one of the first things people notice. Why not turn it into a statement piece? Painting your front door is more than just a surface-level change; it’s one of the simplest ways to dramatically improve your home’s curb appeal. A vibrant, well-finished door creates a welcoming entry, signals care and attention to potential buyers, and instantly elevates the entire front of your house.
Many real estate experts rank painting your front door among the highest-value upgrades you can make on a budget. In fact, the 2024 Cost vs. Value Report from Remodeling Magazine shows that replacing a steel entry door delivers an average 188% return on investment, making it one of the highest-value exterior upgrades homeowners can make.
To get started, you won’t need any prior experience or fancy tools. With a quart of exterior paint, a few basic supplies, and a sunny Saturday, even first-time DIYers can take this on. Whether you go bold with color or stick with a timeless neutral, this project adds polish and personality in just a few hours and sets the tone for your entire home.
Estimated Total Cost: $55–$95
Step-by-Step Process
Creative Twists and Style Upgrades
Let your personality shine through with a few thoughtful flourishes and creative tweaks:
- Choose bold, welcoming colors like red, navy, or sage green to enhance character. If you’re unsure where to start, this roundup of front door paint color ideas from Better Homes & Gardens offers great inspiration for every home style.
- Paint on a dry, warm day. Avoid direct sunlight and humidity to prevent streaks or bubbles. Spring and early fall tend to offer ideal painting weather.
- Consider how your front door color contrasts or complements your exterior siding, trim, and landscaping for maximum visual impact.
- Add details like a new knocker, updated house numbers, a new decorative glass window, or a decorative glass overlay for a truly custom finish that feels fresh and intentional. These finishing touches make your entryway feel cohesive and complete.
Storage Tip: Keep your paint sealed tightly and store leftover supplies in a bin in the garage, or opt for climate-controlled self-storage if you’re short on space at home.
Project #2: Create a Gallery Wall with Thrift Store Finds ($47–$89)
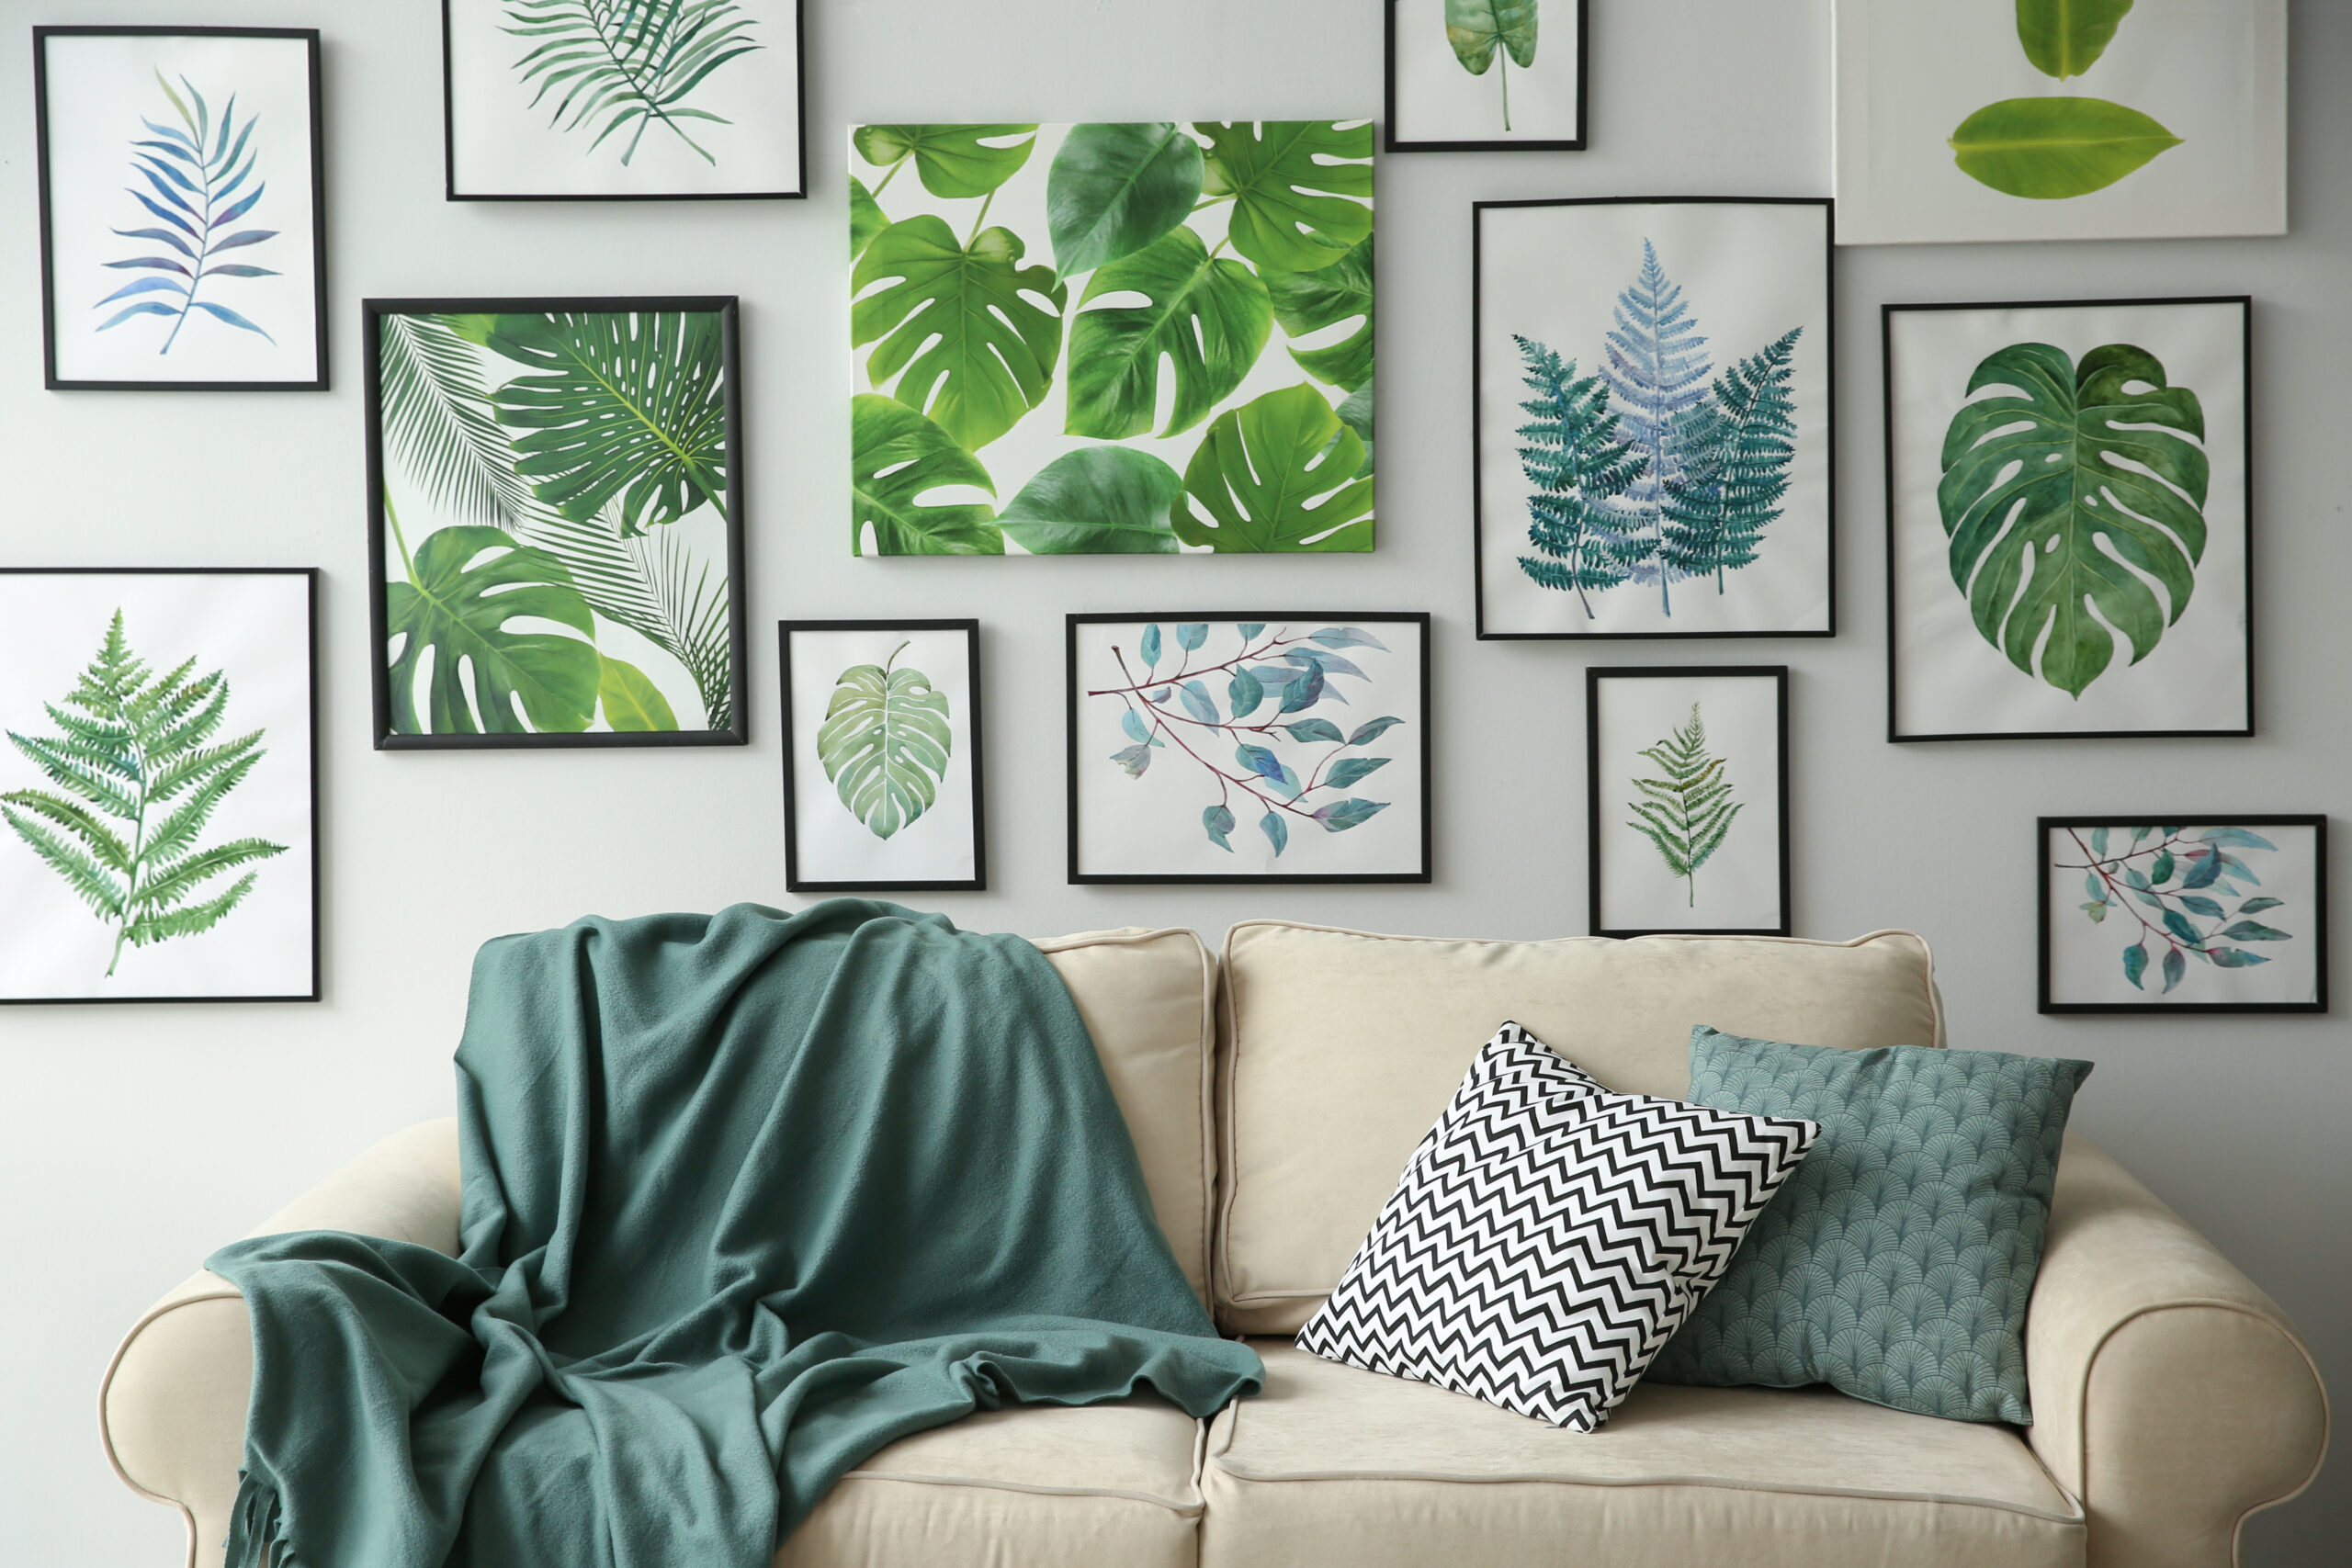
Looking to add personality without committing to wallpaper or paint? A gallery wall is the perfect solution. It’s one of the easiest ways to give a room a designer feel, without the designer price tag. Whether you’re renting a place with strict rules or just don’t feel like painting an entire wall, a gallery wall offers a low-commitment, high-impact upgrade.
The beauty of this project is in the hunt: thrift stores, flea markets, garage sales, and even your own closet can turn up frames, vintage postcards, or quirky art pieces just waiting to be showcased. You don’t need a matched set or expensive art to make it work, just a cohesive layout and a little creativity. And if the frames don’t match? That’s just a fancy way to incorporate a maximalist style! (Or that’s what spray paint is for.) A quick coat in black, white, or gold can instantly tie your collection together.
This is one of those projects that feels personal and evolves over time. Start with a few pieces and add more as you find them; it’s your home’s story, told through the walls.
Estimated Total Cost: $47–$89
Step-by-Step Process
Pro Tips and Creative Twists
- Create a theme: black-and-white prints, botanical sketches, travel photography, or family photos. Or embrace an eclectic mix with bold color stories and unexpected combinations. For creative direction, this gallery wall style guide from House Beautiful showcases several layout and style approaches.
- Mix frame sizes and shapes to create movement, rhythm, and visual interest.
- Incorporate personal or family elements like postcards, dried flowers, family photos, hand-written quotes, or children’s artwork.
- Pro Tip: Maximalist gallery walls are having a moment! Try layering textures, styles, and even frame depths creates an immersive statement wall that feels more curated than chaotic. The key? Stick to a loose palette or visual anchor to ground the arrangement.
Storage Tip: Store unused frames, extra hooks, or seasonal artwork in a labeled plastic bin with soft padding between each piece to prevent scratches or glass breakage. Wrap delicate frames or vintage artwork in bubble wrap or thick paper and keep them upright, not stacked, to avoid pressure damage. For rotating seasonal decor, consider a small-space self-storage unit to keep your home clutter-free while protecting your pieces from humidity and temperature swings.
Project #3: Install Peel-and-Stick Backsplash ($60-90)

Looking for a high-impact kitchen or bathroom upgrade without breaking out the tile saw? Peel-and-stick backsplash tiles are a DIY home renovation dream. They deliver the visual punch of a tiled wall, often in trendy finishes like faux marble, matte black, or metallic—without the grout, dust, or steep learning curve. Perfect for renters or commitment-phobes, they’re also removable when it’s time for a refresh or when your lease is up.This project is a favorite for those who want a dramatic kitchen transformation in just a few hours. According to a 2023 Remodeling Impact Report by the National Association of Realtors, even minor kitchen upgrades like backsplash refreshes can increase a home’s perceived value by thousands of dollars. And because you only need basic tools and a little patience, it’s beginner-friendly, mess-free, and completely doable in one afternoon, even if you’ve never touched a tile in your life.
Estimated Total Cost: $60–$90
Step-by-Step Process
Creative Twists and Style Upgrades
- Choose a pattern that complements your existing decor: subway tile for timeless style, geometric shapes for a modern edge, or faux stone for cozy warmth. For more ideas, check out this gallery of peel-and-stick backsplash inspiration from Apartment Therapy.
- Mix two tile styles, like a solid base row and a patterned upper row, for a custom, designer feel. You could even create color-blocked sections for bold contrast.
- Use peel-and-stick tiles to create a framed statement panel above the stove or sink, or line the back of open shelving to make everyday items pop.
- For a more eclectic or maximalist look, consider layering multiple tile patterns together or alternating colors to create a mosaic-inspired feature wall. See how some DIYers are embracing this trend in these 12 stylish peel-and-stick backsplash ideas from Real Simple.
Storage Tip: Store leftover tiles flat in a cool, dry place. For ongoing projects or for tile matching purposes, keep tile packaging, receipts, and a sample tile in a labeled folder or bin. If you’re tackling multiple areas or need extra space for cutting and prep, a temporary self-storage unit with workbench access can keep the mess out of your kitchen.
Project #4: Build Floating Shelves ($50-95)
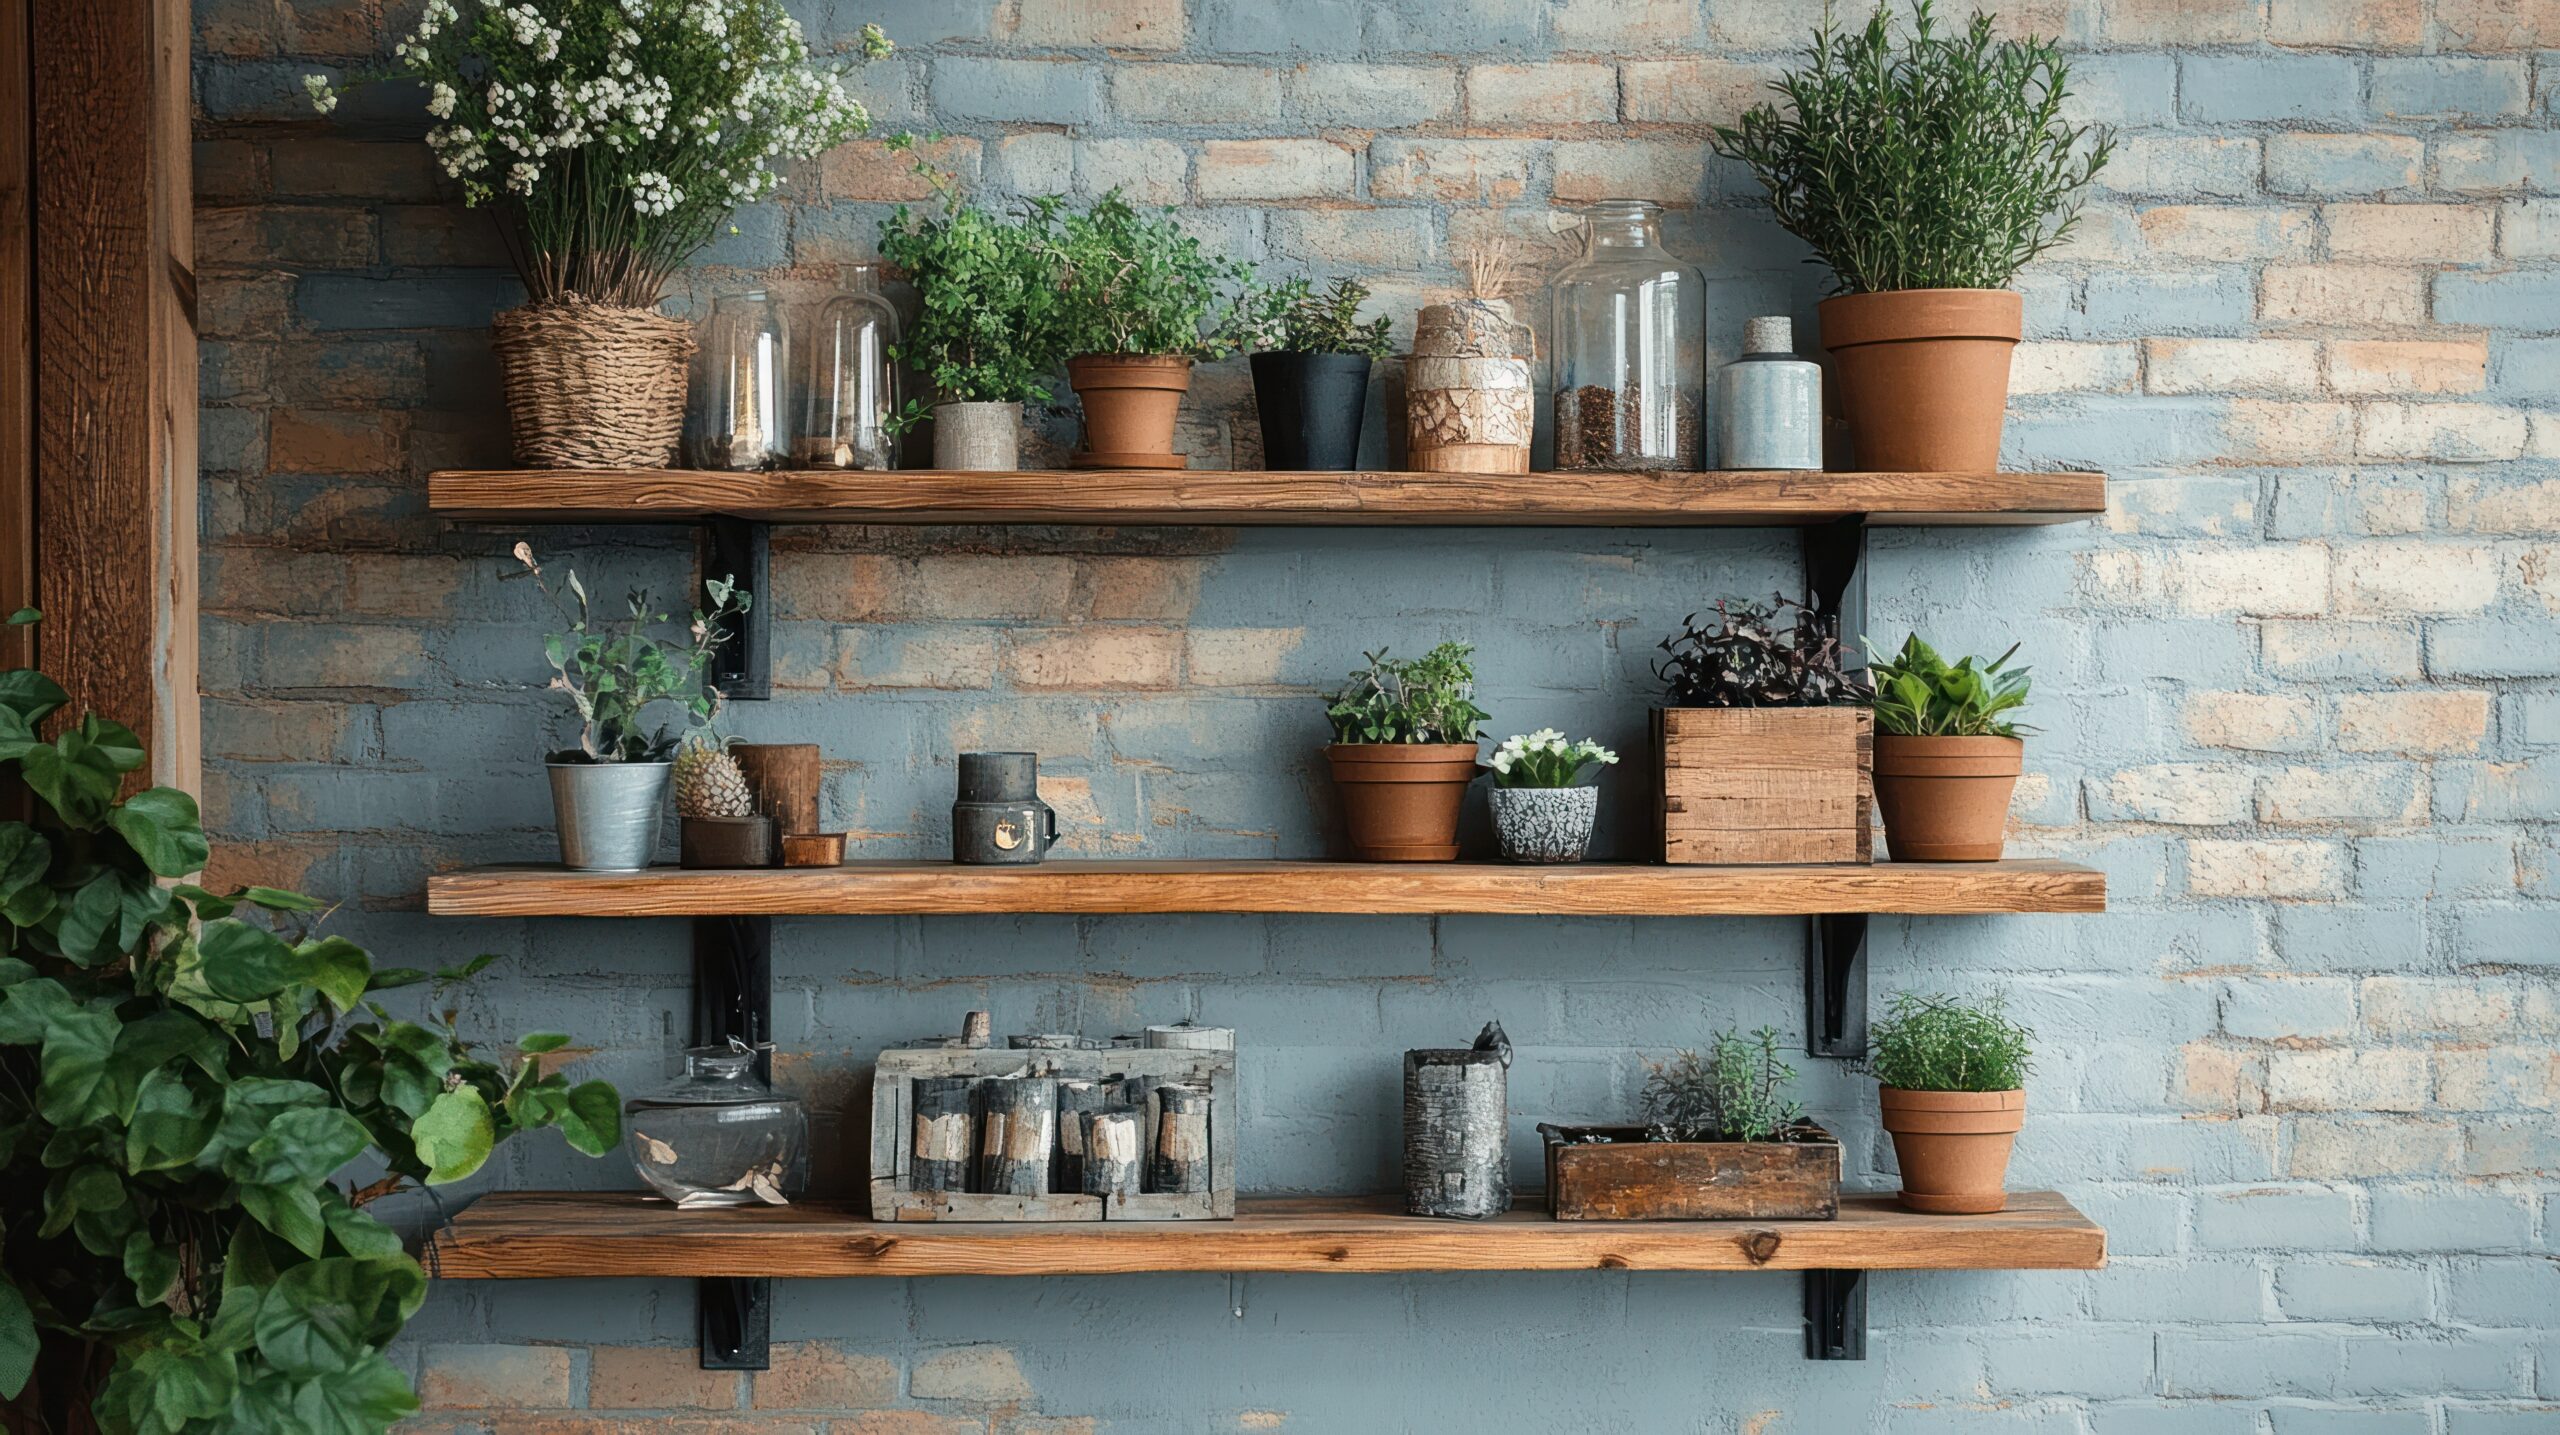
Floating shelves are the unsung heroes of DIY design. They make use of vertical wall space, helping to declutter small spaces and crowded surfaces while giving your home a more open and curated feel. With clean lines and hidden hardware, they deliver a minimalist aesthetic that can easily be dressed up or down depending on the room.
They’re also incredibly versatile—one shelf adds a subtle upgrade, while a stacked or staggered arrangement can become a stunning focal point. Plus, the installation process is beginner-friendly and can usually be completed in an afternoon.
Estimated Total Cost: $50–$95, depending on shelf size, number of shelves, and tool availability
Step-by-Step Process
Alternative Method: If you prefer not to use hidden brackets, floating shelf kits are available that include cleats or mounting frames that are fastened to the wall and covered by a hollow shelf box. This technique is especially useful for creating deeper or custom-width shelves with added support.
Optional Step: Add decorative trim to the shelf edges using wood glue or brad nails to achieve a more polished or architectural look.
Pro Tips and Style Variations
- Choose reclaimed or rough-cut wood for a more industrial, rustic, or boho vibe. Driftwood or pallet wood can also be used for a weathered, coastal look.
- Group shelves in staggered, symmetrical, or even asymmetrical arrangements to create visual rhythm and personality. Consider installing floating shelves in a corner wrap layout for small-space efficiency.
- Always check the weight rating of your brackets and anchors, especially if you plan to display books, ceramics, or other heavier décor.
- For an ultra-budget-friendly version, repurpose old wood planks and use visible L-brackets for a utilitarian or garage-style aesthetic.
- Add LED strip lighting under each shelf for ambiance and functional lighting, particularly in kitchens, offices, or bedside setups.
- Try the trending bench-shelf combination for added utility in entryways or mudrooms. See an example on Architectural Digest.
- For a playful or DIY-forward look, consider creating hula-hoop shelves using circular frames and wood boards for unexpected round accents.
- For more visual, check out:
Storage Tip: If you’re building multiple shelves or prepping materials for more than one room, a dedicated bin or labeled container can help keep brackets, screws, and finishing supplies organized. For bulkier builds, a climate-controlled storage unit can help protect your wood and tools between projects.
Project #5: Upgrade Cabinet Hardware ($49-$85)
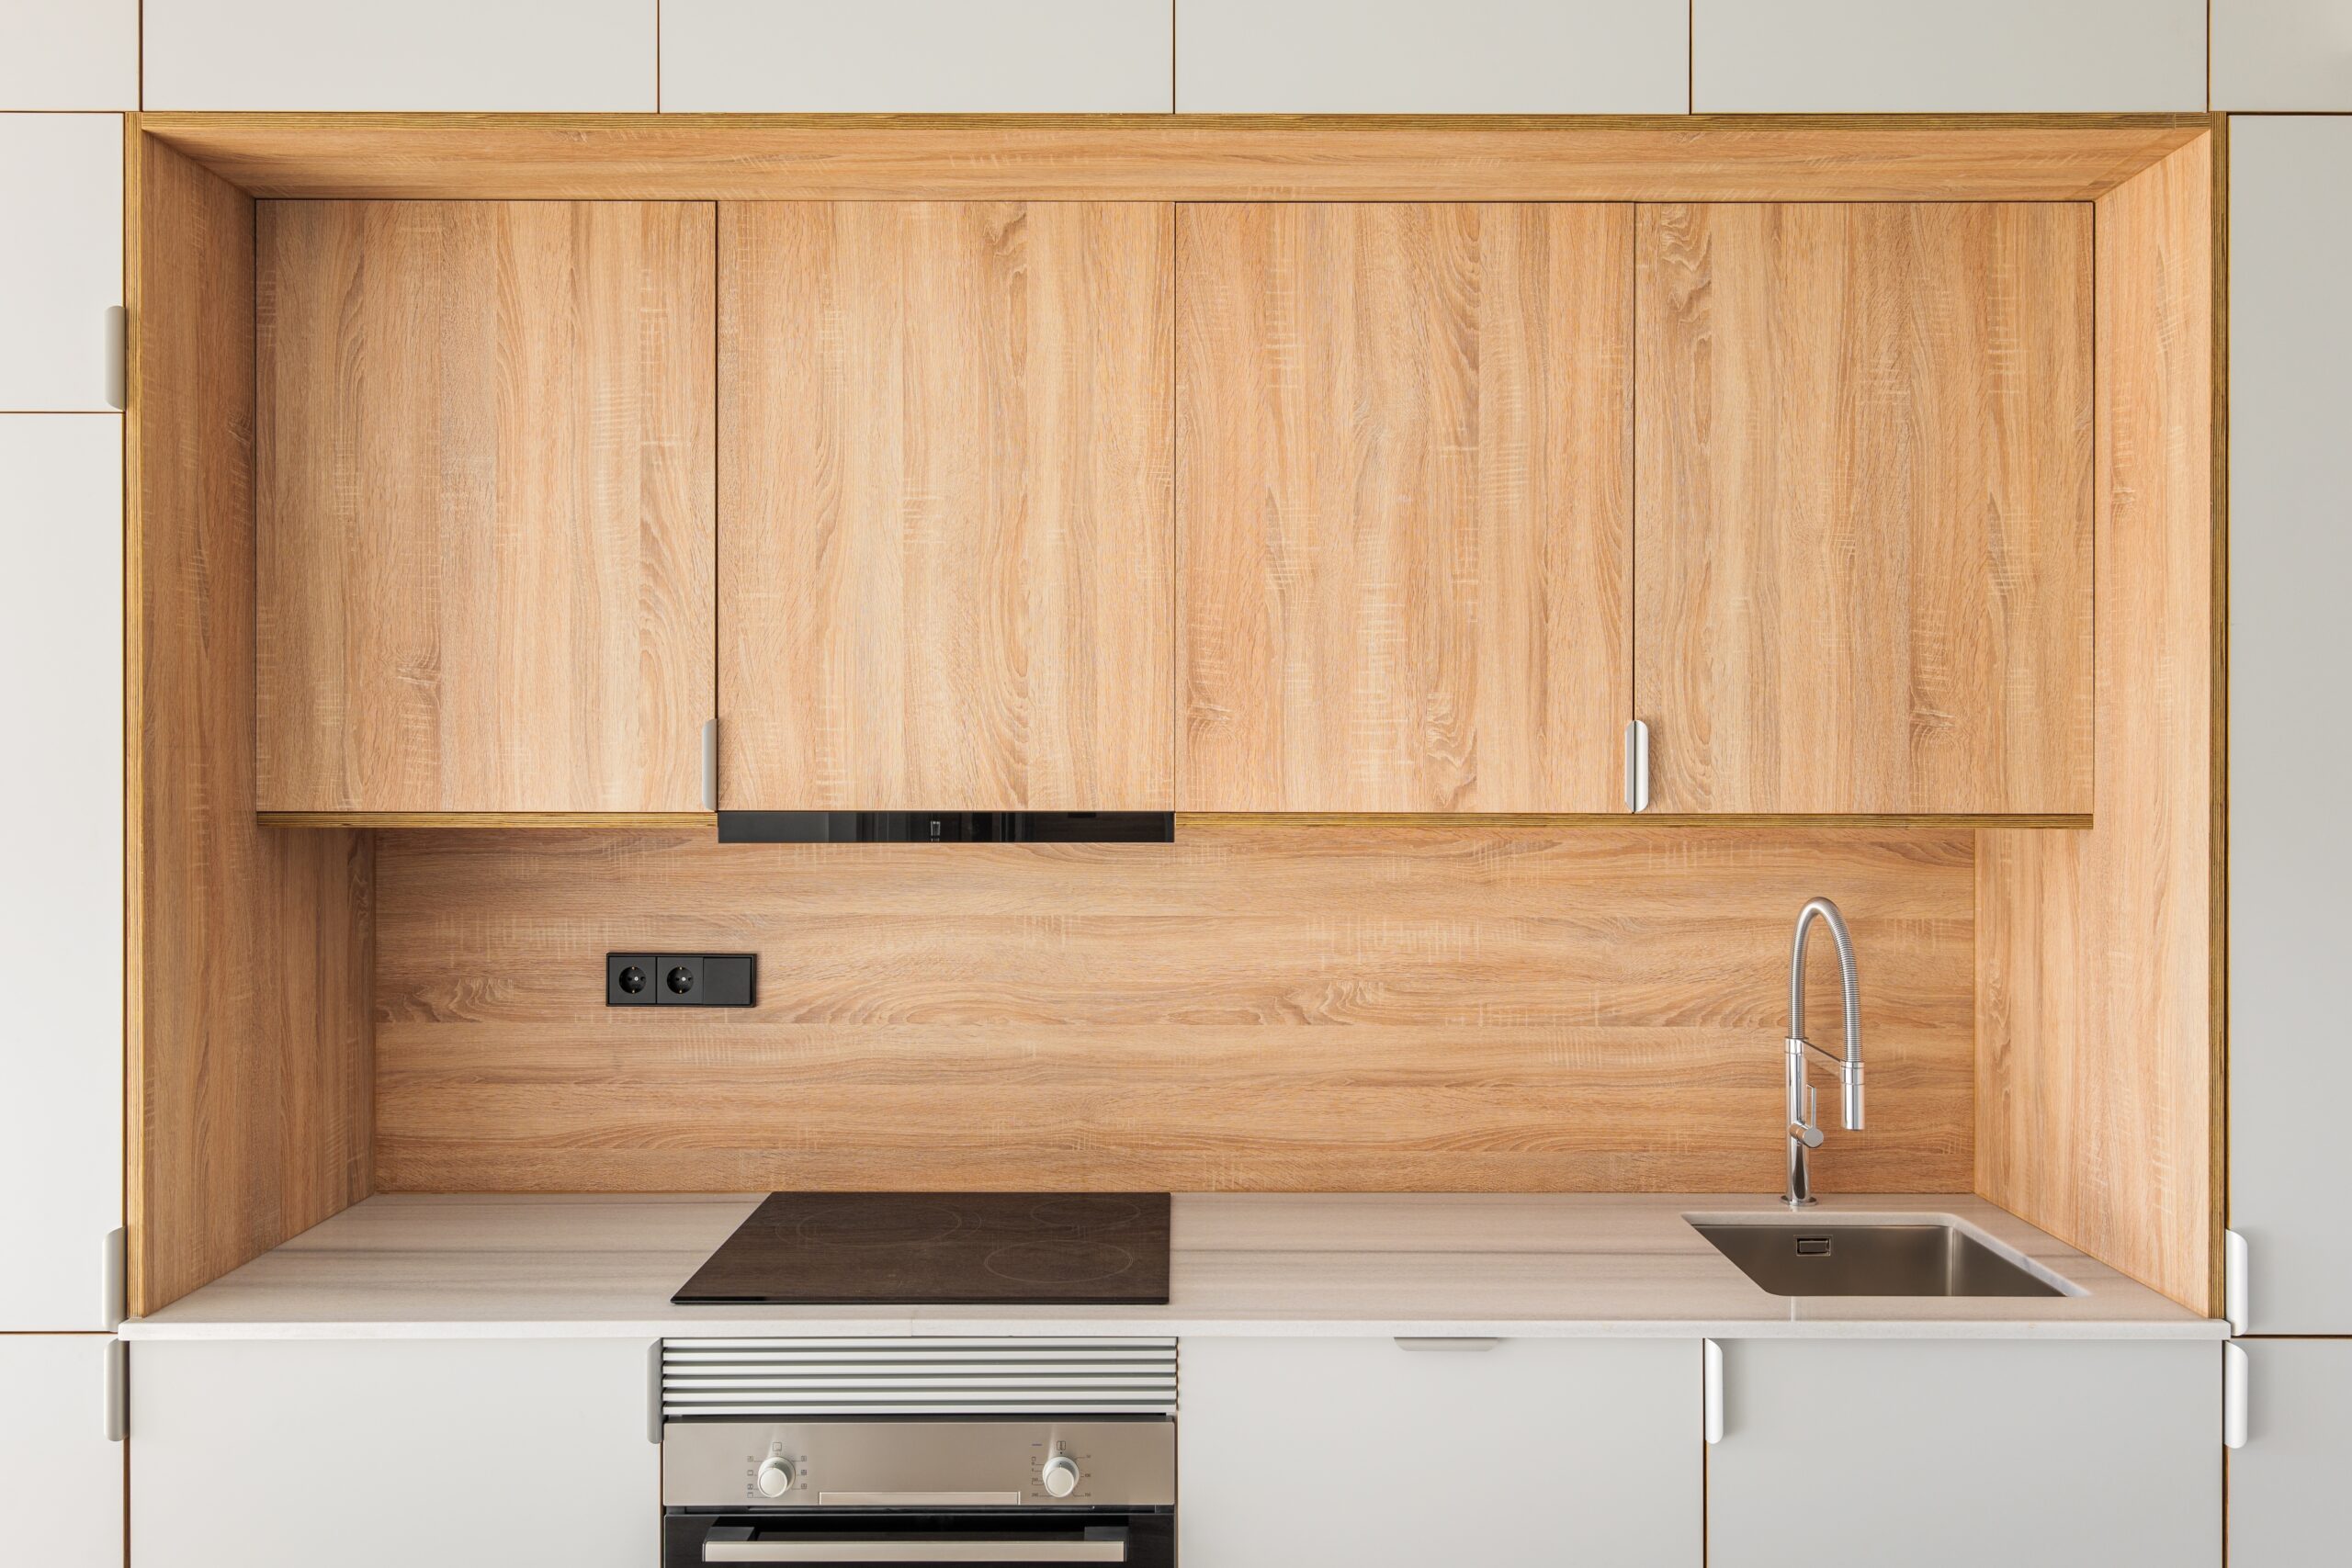
Swapping out your cabinet knobs and drawer pulls may seem like a small tweak, but in the world of DIY design, it’s one of the fastest and most satisfying ways to give your kitchen, bathroom, or even bedroom a fresh new look. Unlike a full remodel or even a repaint, hardware upgrades offer a high-impact transformation with minimal mess. The right set of knobs or pulls can take cabinets from dated to designer in less than a day.
This project also gives you a hands-on entry point into DIY without needing extensive experience. Plus, it’s a renter-friendly option! Many landlords are happy to let you swap hardware as long as you keep the originals to reinstall later. For homeowners, this can be a gateway project to boost resale value or freshen up your interiors on a tight budget.
Updated Estimated Total Cost: $49–$85
Step-by-Step Process
Pro Tips and Creative Tweaks
- Mix and Match: Don’t feel limited to one style. Mix knobs and pulls for a designer-curated vibe—knobs on uppers, pulls on lowers is a popular combo.
- Consider Finishes: Matte black, brass, brushed nickel, and even leather pulls are trending. Just make sure the finish complements your faucet, appliances, and light fixtures.
- Bulk Buying: Consider buying hardware in sets to cut costs. Online shops and hardware stores often offer multi-pack deals or discounts for buying 10+ pieces.
- Upcycle Alert: Thrift stores and vintage markets can be treasure troves for unique, high-quality hardware that you can polish up for a custom look.
Storage Tip: Keep leftover hardware, screws, and templates organized in a labeled zip-top bag or small parts organizer. If you’re renovating in stages or collecting hardware for multiple rooms, consider stashing them in a well-organized hardware drawer or an all-inclusive, personal DIY headquarters self-storage unit to keep everything together and out of the way between projects.
Project #6: Create an Accent Wall with Removable Wallpaper ($55-95)
Want to dramatically transform a room without breaking the bank or breaking your lease? Removable wallpaper is your new best friend. It’s a renter-approved, commitment-free way to add color, pattern, or texture to any space in a matter of hours. From botanical prints to modern geometrics to faux wood planks, there’s a peel-and-stick option for every aesthetic, and plenty of room to get creative. You can go bold with a full accent wall, create a headboard shape above your bed, or add unexpected flair inside bookshelves or closets.
That said, wallpaper isn’t always the easiest material to work with. It can wrinkle, stretch, or misalign if your walls aren’t perfectly smooth or if you rush the application. For some DIYers, especially beginners, this can be frustrating. But if you take your time and plan it out, the end result is often worth the effort and the compliments you’ll definitely receive.
Estimated Total Cost: $55–$95
Step-by-Step Process:
Pro Tips and Creative Tweaks
- Small Room, Big Pattern: Large prints can make small spaces feel dramatic and curated. They work especially well in powder rooms, reading nooks, or behind open shelving. For ideas on how to scale patterns for tight spaces, this list of peel-and-stick wallpaper inspiration from Better Homes & Gardens offers plenty of creative ideas.
- Dealing with Texture: If your walls aren’t perfectly smooth, choose wallpaper designed for light texture or use lining paper to create a better base for application.
- Half-Wall Design: For a clean, modern look, try wallpapering just the bottom half of the wall and topping it off with a chair rail. This trick adds dimension without overwhelming the room.
- Paint Pairing: Pair wallpaper with a coordinating paint color to create a two-tone effect or a bold contrast. Check out this post from The Spruce for accent wall do’s and dont’s.
Storage Tip: Save any leftover wallpaper by rolling it and storing it in a labeled tube or plastic sleeve to prevent creasing. Keep the original label or product info in case you want to order more later. If you’re working on a few different rooms, self-storage can be a safe place to keep rolls, tools, and supplies together and undamaged.
Project #7: Install LED Strip Lighting ($45-$80)
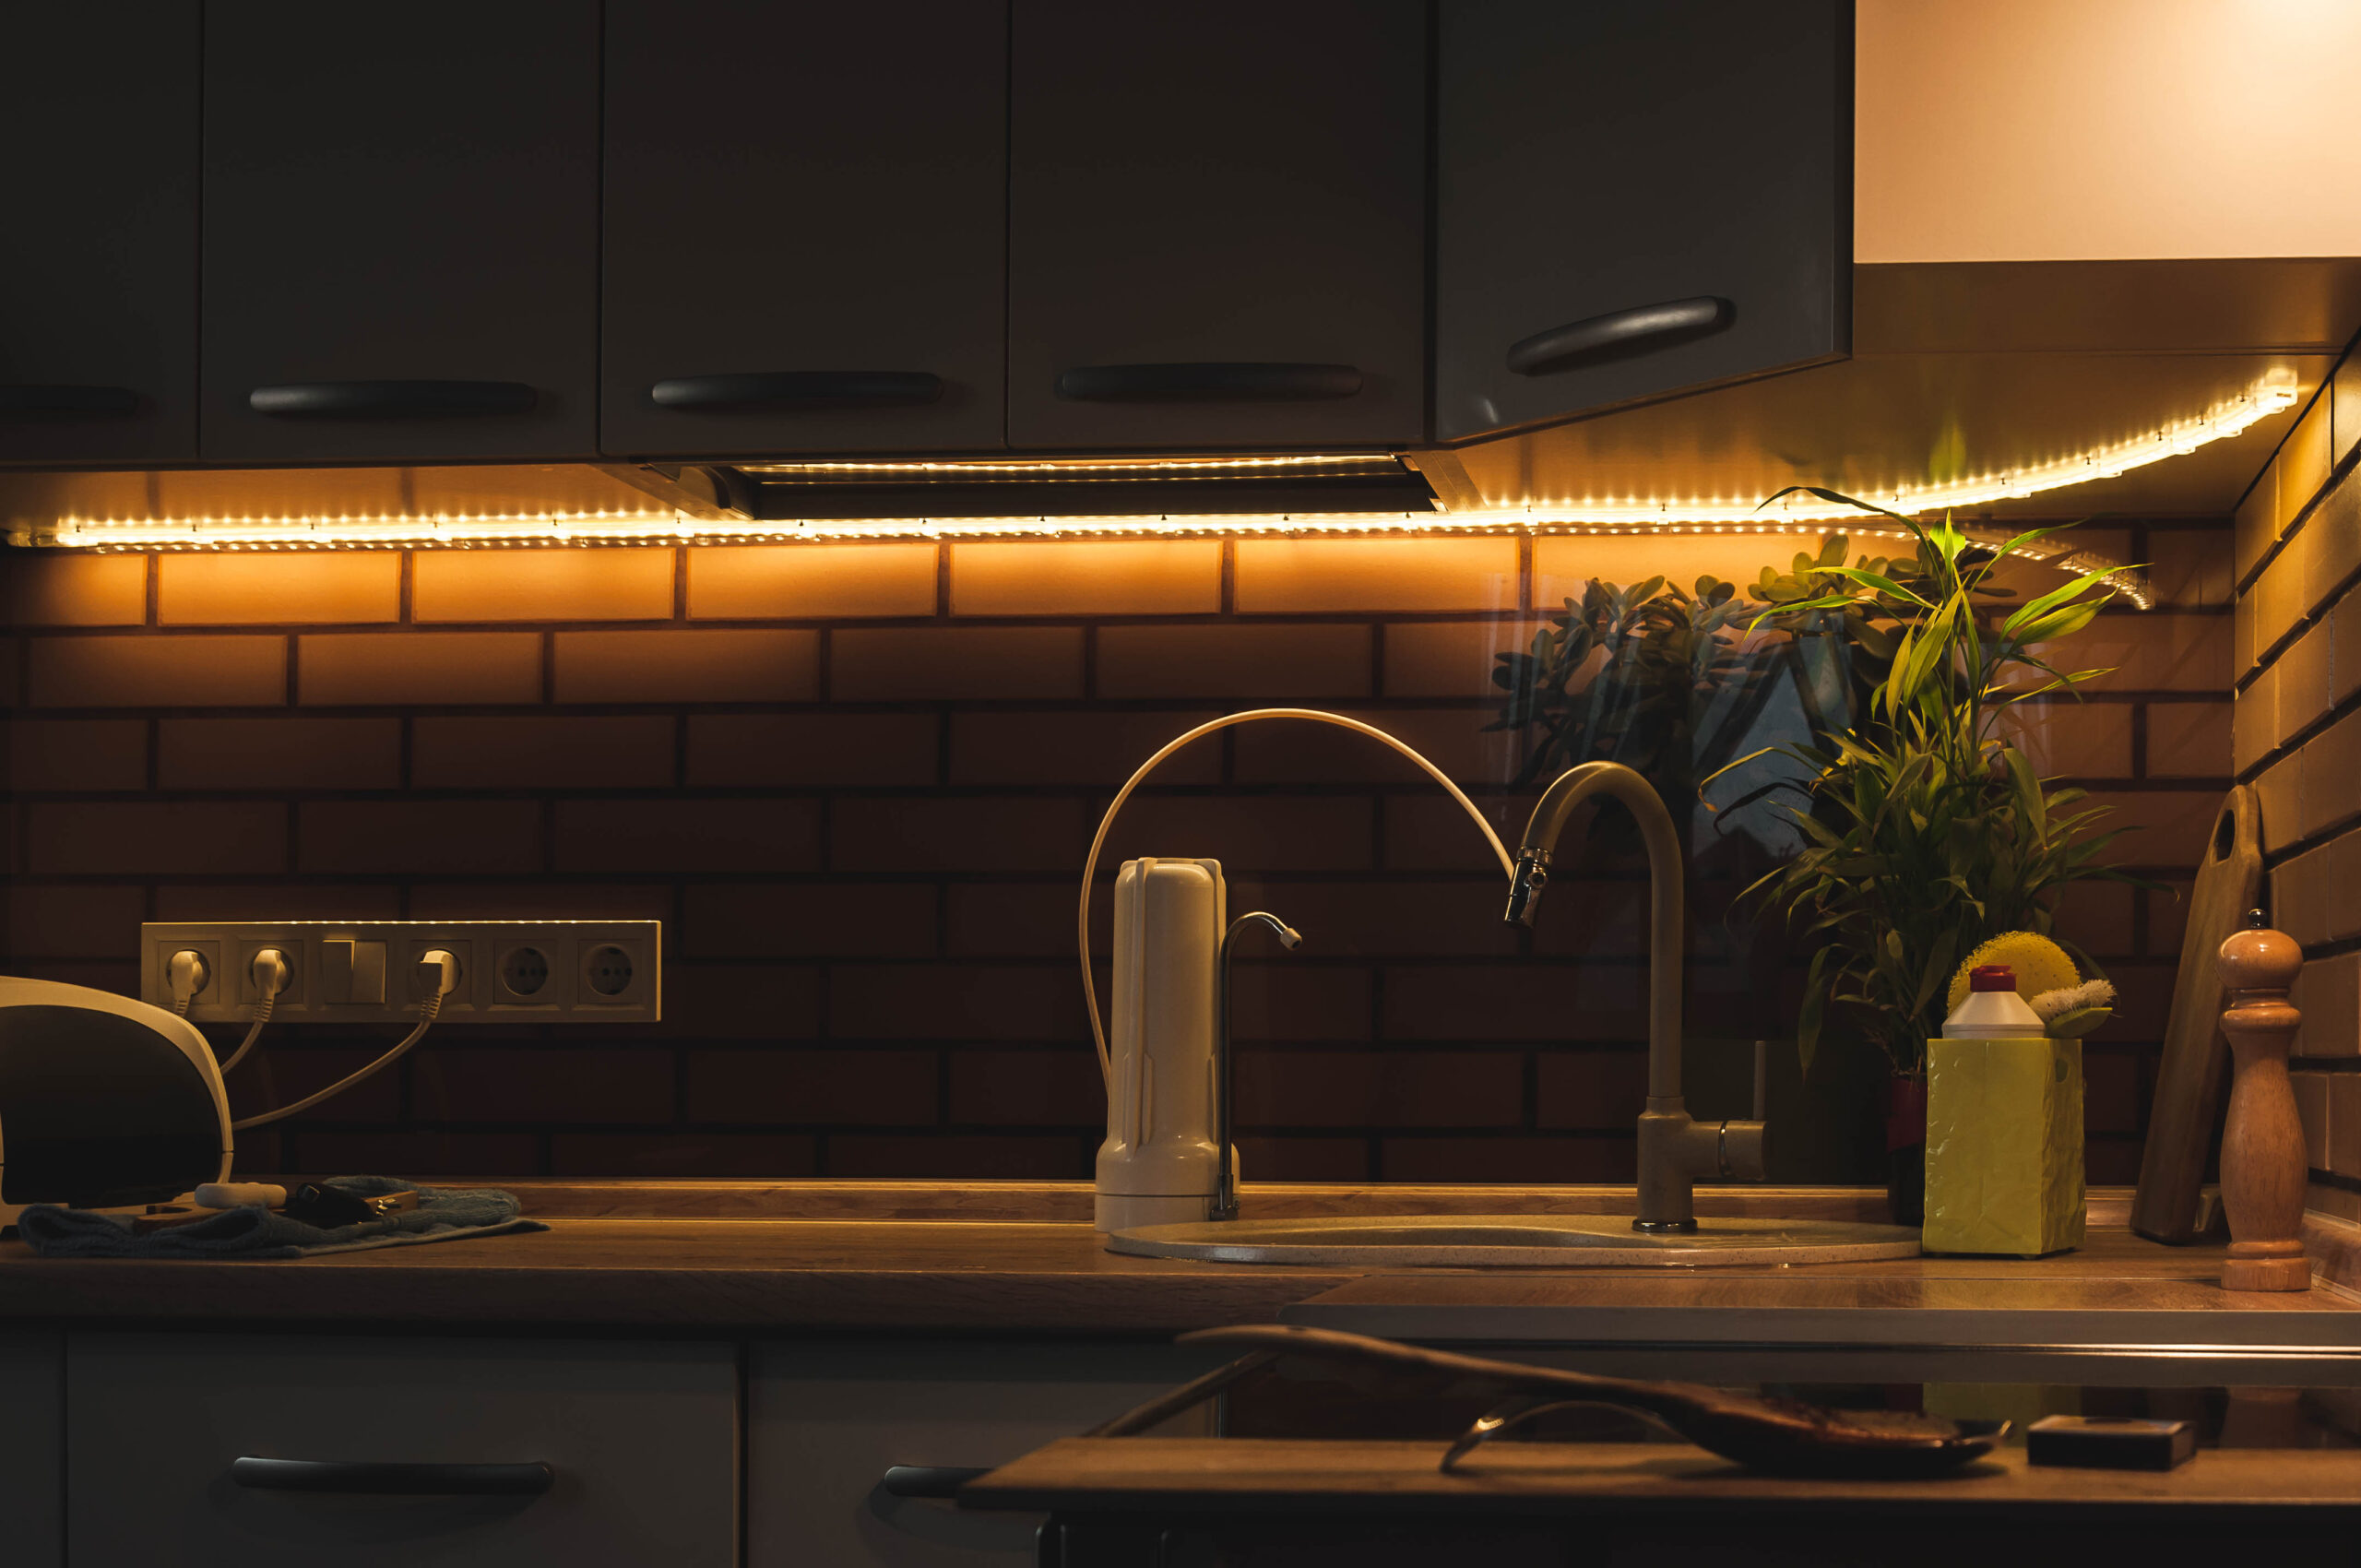
LED strip lighting is one of the most accessible and dramatic upgrades you can bring to a space—no paint, no nails, no mess! It’s a lighting solution that brings personality, mood, and even a touch of magic into your home. With a few feet of flexible, adhesive-backed LEDs, you can accent shelves, define nooks, and highlight architectural features with a glow that feels both cozy and modern.
These programmable, color-shifting strips work brilliantly behind TVs for a cinematic vibe, under cabinets to brighten up meal prep, around ceilings to add dimension to a bedroom, or you can even make fun shapes and create an artistic festival feel. They’re also great for renters (most can be removed without damage), and you can find options that integrate with smart home systems for full control via app or voice command.
Estimated Total Cost: $45–$80
Step-by-Step Process
Pro Tips and Creative Tweaks
- Select a color temperature that fits the room’s mood. Warm white (2700K–3000K) creates a relaxing atmosphere, while cool white (4000K–6000K) adds bright, clear lighting for tasks.
- Use a smart home–compatible kit if you want to control your lights via Alexa, Google Assistant, or mobile apps.
- Add lighting to unique spots like stair undersides, the backs of mirrors, inside closets, or around shelving for creative impact.
- Choose dimmable LED strips to create different moods throughout the day and help reduce energy consumption.
- Waterproof LED strips are perfect for outdoor areas like patios or balconies, letting you take the glow outside.
Project #8: Build a Simple Planter Box ($80-$155 depending on tools)
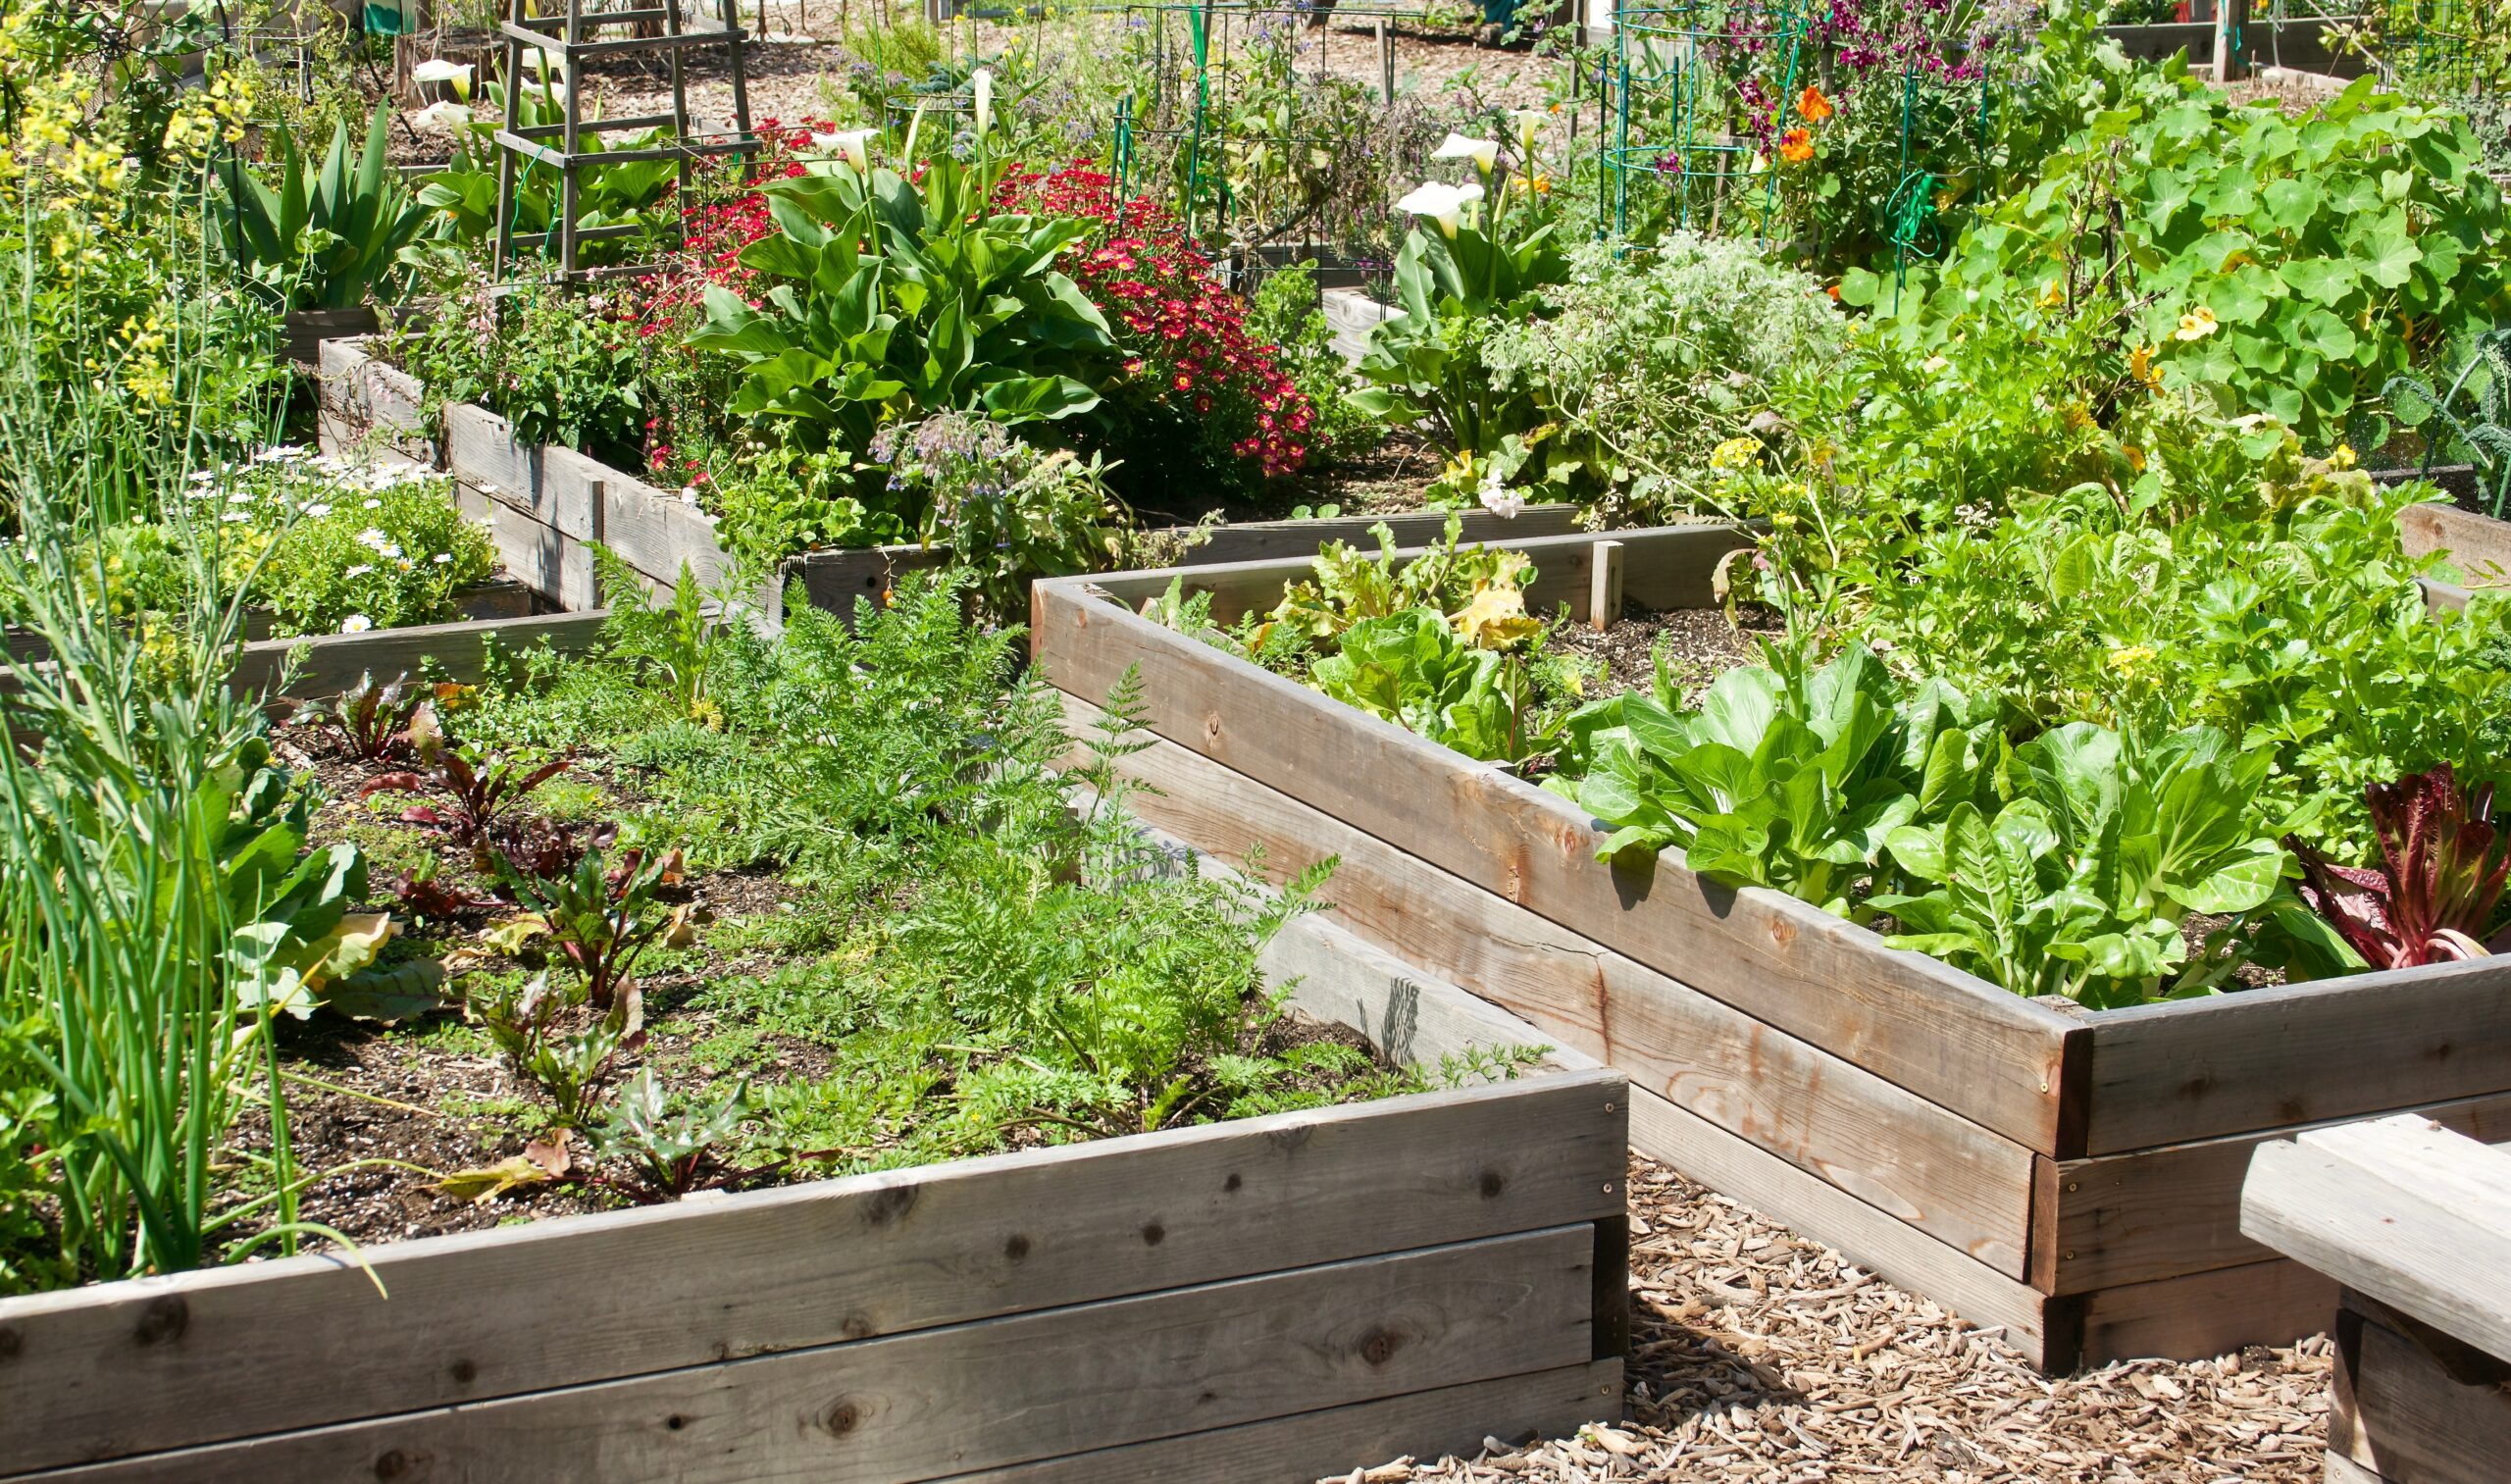
Whether you’re dreaming of a charming herb garden or just want a fresh way to bring color and life to your front porch, building a simple planter box is an approachable and rewarding weekend DIY. It doesn’t require a workshop full of tools or years of experience, just a few boards, some screws, and a little bit of time. You can tailor the dimensions to fit a narrow balcony, a wide porch, or even place one on a windowsill if space is limited.
And your new planter box? It’s a blank canvas. Fill it with seasonal blooms, decorative grasses, or kitchen herbs that keep giving all year long. Basil in the summer, mums in the fall, and even mini evergreens around the holidays. With this project, you’ll end up with a result that not only boosts your home’s curb appeal but also brings functionality and beauty to your outdoor space.
Plus, you’ll likely save a chunk of change compared to pre-fabricated planter boxes sold at garden centers, and you’ll have the satisfaction of building something with your own hands!
Estimated Total Cost: $80–$155 (depending on tool availability)
Step-by-Step Process
Pro Tips and Style Variations
- Adjust the height or length to fit your porch, balcony, or patio. Taller boxes are easier on the back and great for small patios.
- Add handles or casters to make your planter mobile—perfect for chasing the sun or moving indoors during colder months.
- Create a tiered look by stacking smaller boxes or building multi-level units.
- Coordinate your planter paint color with your front door for a polished, intentional look.
- Pro Tip: If you don’t have tools, many hardware stores will cut lumber to size for you—just bring your measurements!
- For planter inspo, check out:
Project #9: Create a Command Center Organizer ($43-$85)

We all know the feeling: keys go missing, school papers pile up, and you’re late because no one can find the weekly schedule. That daily chaos is exactly why more and more homeowners are carving out space for a DIY command center. It’s not just a Pinterest-worthy idea, it’s a highly practical solution that can streamline the flow of your household. A command center gives every item a designated spot, turning scattered mornings into something a little more manageable.
You don’t need a ton of money or wall space to make it work. Whether you’re managing a full household of kids and activities or just trying to stay on top of your own appointments and bills, this project can be tailored to your life. Because you’re building it yourself, you can make sure it fits your space, your style, and your schedule.
Estimated Total Cost: $43–$85
Step-by-Step Process
Pro Tips and Creative Variation
- Incorporate QR codes that link to shared calendars, grocery lists, or family checklists to integrate tech in a helpful way.
- Place the command center in a high-traffic area like the entryway, mudroom, or kitchen where it’s most likely to get used daily.
- Expand over time with features like a dry-erase board, meal planning section, key cubbies, or even a rotating seasonal to-do list.
- Choose a cohesive design theme or color palette to blend it seamlessly with your home’s décor, whether it’s minimalist, farmhouse, or boho.
- Use floating wall shelves or a pegboard system to keep everything elevated and organized while adding a modern look.
Project #10: Refresh Bathroom Fixtures ($65-$115 depending on fixture)
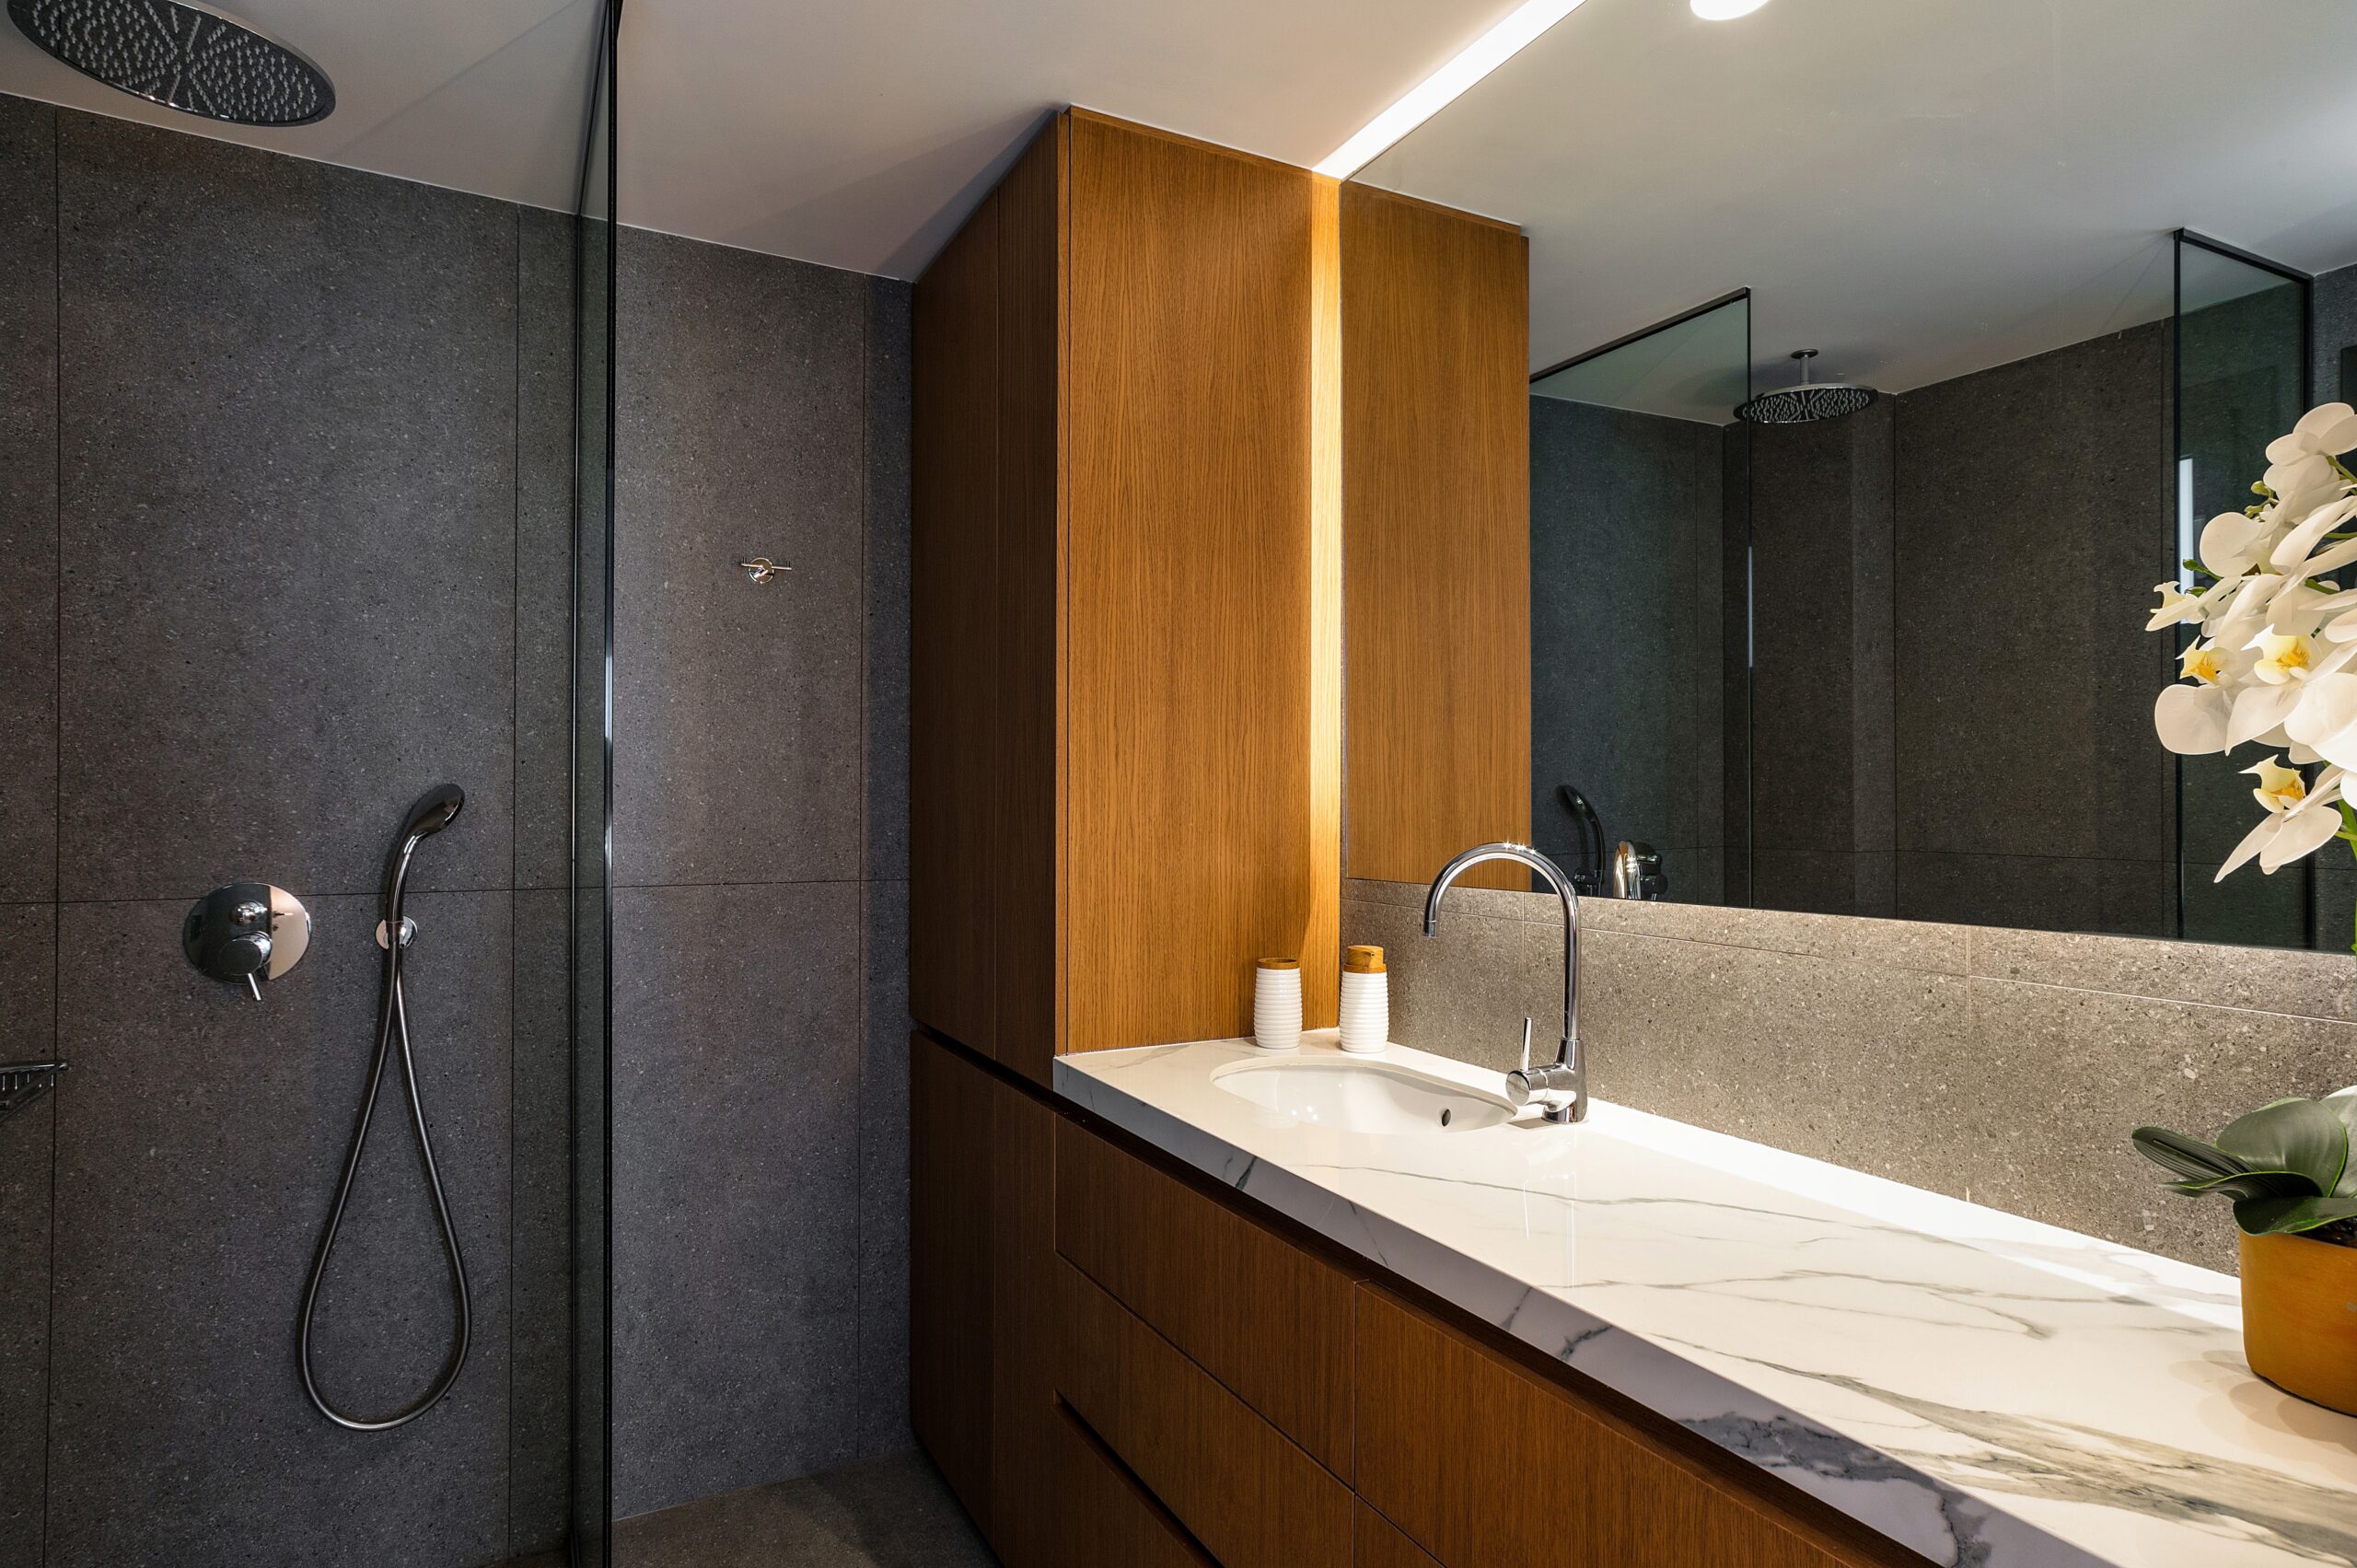
If you’re craving a spa-like upgrade but don’t want to rip out tiles or replace vanities, updating your bathroom fixtures might be the sweet spot. Swapping out an old, leaky faucet or dated showerhead can make your bathroom feel modern, fresh, and even a little more luxurious, without the price tag of a full renovation. It’s also one of those projects that pays dividends in daily life. Better water pressure? A sleeker aesthetic? Yes, please. Plus, if you choose a water-efficient model, you might even lower your utility bills while you’re at it.
Even if you’re not particularly handy, this is a beginner-friendly DIY that doesn’t take much time or money. And for renters, many of these fixture swaps are reversible, just save the old ones to reinstall when you move out.
Estimated Total Cost: $65–$115
Step-by-step process
Pro Tips and Creative Twists
- Use this Home Depot guide to choose a faucet type that fits your sink configuration.
- Consider switching to a handheld showerhead for more versatility, great for families, pets, and easy cleaning.
- If your sink or tub fixtures are unusually old or corroded, take photos and bring them to your local hardware store for help finding compatible replacements.
- For extra flair, pair your new fixtures with updated light switch plates or wall sconces in a matching finish.
When DIY Projects Outgrow Your Space
As your home fills with new project plans, half-finished projects, bags of supplies, and tools waiting for their next task, you might start feeling like you’re working out of a cluttered closet instead of a calm, creative space. It’s a common issue for passionate DIYers—there’s just never quite enough room. That’s when it’s time to think beyond your four walls.
Self-storage can be a game-changer when your home reaches maximum capacity. It offers room to spread out and stay organized without compromising your living space. But how do you know it’s time to make the leap? And how do you choose between short-term and long-term storage?
Ask yourself:
- Are you constantly moving tools out of the way just to cook dinner or walk through the hallway?
- Have you delayed a project because you can’t find the materials you bought for it?
- Are seasonal items like holiday lights or garden tools taking up space year-round?
- Do you avoid starting new projects because of the mess left by the last one?
- Is your garage, basement, or spare room starting to look more like a warehouse than part of your home?
If you answered yes to any of these, a storage unit could be exactly what you need to reclaim your space and keep projects moving smoothly.
Climate-controlled storage units protect adhesives, wood, electronics, and paint from extreme temps and moisture. They’re ideal for sensitive materials that need a stable environment. For larger items like bags of mulch, tools, or décor, look for drive-up units and flexible month-to-month leases.
And remember, the organization doesn’t stop once it’s out of your house. Outfit your unit with shelves, labeled bins, and even rolling carts to make every supply easy to find and grab.
Whether you’re mid-makeover or storing supplies for your next big transformation, self-storage can be the key to staying organized without sacrificing your space. Explore self-storage options near you to find a unit that fits your DIY life.
Transform Your Home Without Breaking the Bank
You don’t have to spend thousands to breathe new life into your space. As this guide proves, with a little creativity, elbow grease, and a budget under $100, you can make upgrades that deliver serious style and function. From modernizing your bathroom to building custom shelving, each project adds value and a sense of pride to your home.
If you’re just getting started on your DIY journey, remember: it’s okay to take things one step at a time. Many of these upgrades are beginner-friendly, designed to help you build confidence and skill without the pressure of perfection.
And as your tools and supplies multiply, don’t let clutter keep you from reaching your renovation goals. Self-storage can be your DIY secret weapon, giving you the flexibility and space to keep going, season after season.
Find a storage solution that fits your project timeline and budget today, and start building a home you love, one weekend at a time!
Looking for more home DIY projects? Check out our other guides: