Article takeaways
- Start winter prep 4-6 weeks before the first freeze, or risk paying emergency rates when your furnace dies at midnight.
- Deep winter cleaning isn’t optional because you’ll spend four months sealed inside, breathing whatever’s lurking in your ducts.
- Proper storage of summer items protects thousands of dollars in belongings and creates space for winter essentials.
- Climate-controlled storage units solve the space crisis that stops most people from winterizing properly.
Last year, Dave skipped winter prep. “Too busy,” he said. “I’ll get to it.”
December came. So did a cold snap. His pipes burst on a Tuesday night. Thousands in repairs. A week in a hotel. Ruined hardwood floors. Insurance claims. Dave got to it, alright. He got to experience every homeowner’s nightmare because he put off a weekend’s worth of work.
Don’t be Dave.
Preparing your home for winter isn’t exciting. Nobody’s going to compliment your weatherstripping or your properly drained garden hoses. But it’s what stands between cozy winter evenings by the fireplace and catastrophic failures that drain your bank account.
Some of these tasks take five minutes. Others take a weekend. All of them beat dealing with burst pipes, a dead furnace at 2 am, or discovering your entire summer wardrobe smells like mildew when June rolls around.
Whether you’re in Minnesota, bracing for months of snow, or Tennessee, preparing for that one week of hard freezes, winter doesn’t care about your schedule, your budget, or your good intentions. It’s coming. Let’s make sure you’re ready.
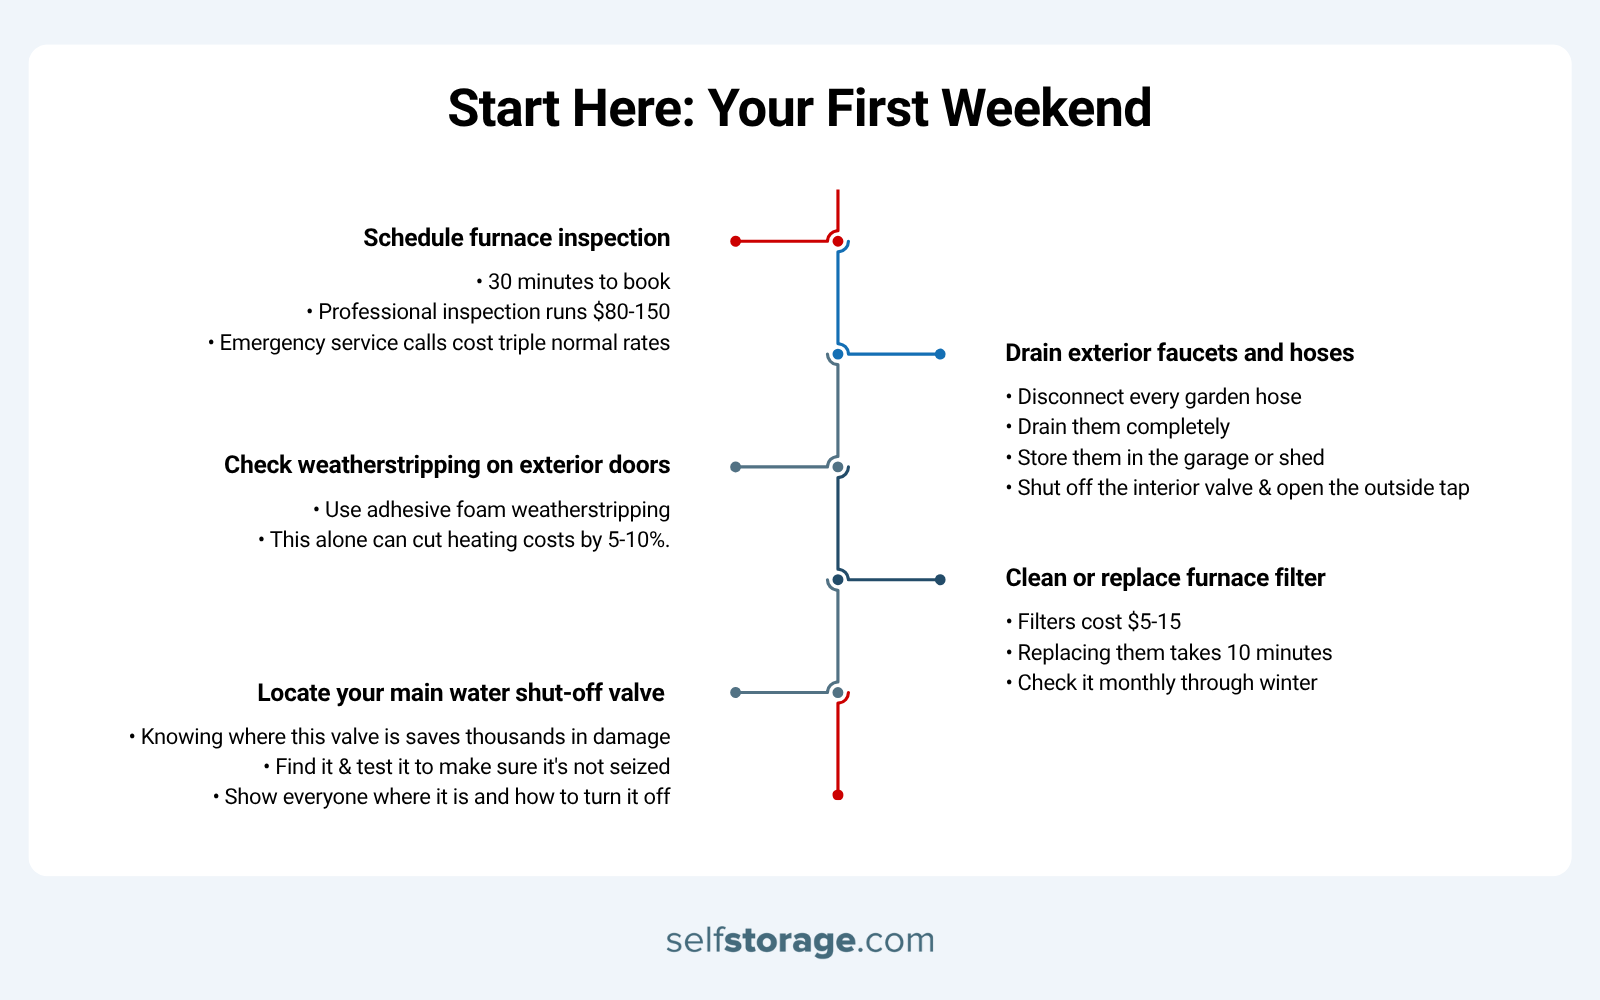
Start Here: Your First Weekend
Feeling overwhelmed? You don’t have to do everything at once.
If you only have ONE weekend before winter hits, do these five things. Everything else can wait. These five? Non-negotiable.
1. Schedule furnace inspection (30 minutes to book)
Professional inspection runs $80-150. They’ll check for carbon monoxide leaks, test the heat exchanger, measure airflow, and catch problems before they become $3,000 emergencies in January. Freezing to death in your own home isn’t on anyone’s bucket list, and emergency service calls cost triple normal rates.
2. Drain exterior faucets and hoses (30 minutes total)
Disconnect every garden hose. Drain them completely. Store them in the garage or shed. Shut off the interior valve that supplies your exterior faucets and open the outside tap to let the remaining water drain. Burst pipes cost an average of $11,000 to repair. This task costs you nothing but half an hour.
3. Check weatherstripping on exterior doors (1 hour)
Close your door on a dollar bill. Can you pull it out easily? Your weatherstripping is dead. Head to the hardware store and grab adhesive foam weatherstripping, around $5-10 per door. The job takes 15 minutes per door. This alone can cut heating costs by 5-10%.
4. Clean or replace furnace filter (10 minutes)
A dirty filter makes your furnace work harder, costs you more money, and shortens your system’s life. Filters cost $5-15. Replacing them takes 10 minutes. If you don’t know where your filter is, find out now. Check it monthly through winter.
5. Locate your main water shut-off valve (15 minutes)
In a pipe burst emergency, knowing where this valve is saves thousands in damage. Usually, it’s near where the main water line enters your house, often in the basement or crawl space. Find it. Test it to make sure it’s not seized. Show everyone in your household where it is and how to turn it off.
Done with these five? You’re ahead of 80% of homeowners. Everything else in this guide just makes you even more prepared.
Why Winter Home Preparation Matters (Besides Not Being Dave)
Winter preparation is insurance you pay with your time instead of your money.
The Financial Reality
Burst pipes don’t just cost money to fix. They destroy flooring, furniture, drywall, and anything stored in the affected area. $11,000 average claim according to the Insurance Information Institute. That doesn’t count your deductible, premium increases, or items that weren’t covered.
A dead furnace in the middle of winter means emergency service rates (often $200-300 just to show up), plus rush charges on parts, plus possible hotel costs if your house becomes uninhabitable. One emergency repair often costs more than a year’s worth of preventive maintenance.
Heating accounts for about 29% of utility bills in typical U.S. homes. Proper winterization reduces those costs by 10-20%. On a $200 winter monthly heating bill, that’s $20-40 per month. Over a four-month winter, you’re saving $80-160. Over ten winters? That’s $800-1,600 you didn’t give to the utility company.
The Health Angle
Winter means sealed windows for months. What dust, allergens, mold, and mystery particles are in your house right now? You’re going to breathe them all winter long. Deep cleaning before winter isn’t about being neat. It’s about not giving yourself respiratory issues for four months straight.
A well-maintained heating system with clean filters produces fewer allergens and better air quality. Carbon monoxide from a poorly maintained furnace will literally kill you. Better air quality isn’t a luxury. It’s survival.
The Sanity Factor
Nothing destroys your peace of mind quite like lying in bed listening to your furnace make weird noises and wondering if it’s about to die. Or looking at your water-stained ceiling and realizing you should’ve cleaned those gutters. Or digging through a chaotic garage at 6am during the first snowstorm, trying to find the snow shovel while your car is buried.
Proper preparation means you sleep better, stress less, and don’t spend winter weekends dealing with emergencies that could’ve been prevented.
Protecting your stuff matters too. Storing patio furniture properly beats replacing $2,000 worth of ruined outdoor seating every few years. Your summer clothes deserve better than a basement flood or attic mildew experiment.
The Space Problem: Why Winter Prep Actually Fails
Most winter prep guides skip over the real reason people don’t winterize properly. It’s not laziness. It’s not a lack of knowledge.
It’s space.
You can’t bring winter items forward if your closets are already stuffed with summer clothes. You can’t store patio furniture in the garage if it’s already full. You can’t organize winter gear when you’re playing storage Tetris with beach chairs, pool toys, and camping equipment.
This is where people get stuck. They read guides like this, get motivated, open their garage, see the chaos, and close the door. Problem unsolved. Winter arrives anyway.
Your home has a fixed amount of storage. When seasonal items exceed that capacity, something’s gotta give. You have three options:
- Purge ruthlessly – Get rid of stuff you haven’t used in 2+ years (harder than it sounds)
- Live with chaos – Trip over summer stuff all winter, hate your life, can’t find anything
- Expand your storage – Use a storage unit for seasonal rotation (smarter than most people think)
Option 3 isn’t admitting defeat. It’s recognizing reality. Climate-controlled storage units cost $50-150/month, depending on size and location. They completely transform your seasonal transition.
Store $2,000 worth of patio furniture for a few hundred dollars over four winter months, or face replacement costs when winter weather damages it. Storage often wins.
You don’t keep your snow blower, winter tires, and sleds out all summer, taking up space. Why would you keep your pool floats, patio cushions, and summer sports equipment out all winter?
We’ll talk more about storage solutions throughout this guide, but understand this upfront: if you’re fighting a space battle, you’ve already lost the winter prep war before it starts.
Winter Cleaning: Deep Clean Before the Cold Sets In
Why Winter Cleaning Is Different
Spring cleaning is about freshness and renewal. Nice, but optional.
Winter cleaning? That’s about survival.
You’re going to spend the next four months sealed inside with whatever dust, allergens, mold, pet dander, and mystery smells are lurking in your house right now. Better make peace with them or eliminate them. There’s no “I’ll open the windows and air it out” option in January.
Spring cleaning focuses on deep freshening. Winter cleaning focuses on creating a healthy sealed environment and making space for the seasonal transition. Every surface you clean now is one less source of particles circulating through your heating system for months.
The closed-up nature of winter homes means odors linger. Moisture accumulates. Dust settles and then gets blown around by your heating system. That musty basement smell becomes way more noticeable when you’re not opening windows regularly.
Winter cleaning creates the physical space you need for seasonal storage transitions. Those bulky winter coats, boots, blankets, and gear need somewhere to live. Before you can bring winter items forward, you need to clear out summer belongings and actually clean the spaces they’ll occupy.
⏱️ TIME NEEDED:
Deep cleaning your entire house takes 12-16 hours spread across 2-3 weekends if you’re doing it yourself. Or 4-6 hours if you hire the big jobs (carpet cleaning, window washing) and handle the rest./
Room-by-Room Winter Cleaning Guide
Living Areas: Where You’ll Actually Live All Winter
Your living room takes on new importance during winter when everyone gravitates toward warm, cozy spaces. Time to make sure it’s actually pleasant to spend time there.
Fireplace Reality Check
If you have a fireplace, schedule a professional chimney inspection and cleaning now. Not later. Now. Creosote buildup causes chimney fires, and the National Fire Protection Association recommends annual inspections. Cost runs $125-250, depending on your area. Skip this and risk a chimney fire or carbon monoxide poisoning. Not worth the gamble.
Carpets and Upholstery
Deep clean your carpets and upholstery before winter sets in. These fabrics trap dust, pet dander, and allergens that become more problematic when you can’t air out your home regularly. Steam cleaning or hiring professionals runs $100-300 for an average home. Worth every penny when you’re breathing that air for four months.
Don’t forget window treatments. Curtains and blinds collect surprising amounts of dust. Wash curtains according to care labels. Vacuum or wipe down blinds. Clean ceiling fans too, since you’ll be reversing their direction for winter (clockwise on low speed pushes warm air down from the ceiling).
Vacuum behind and under furniture where dust bunnies multiply unseen. Wipe down baseboards and vents where dust accumulates and gets blown into your living space when heating kicks on.
Kitchen: Command Center for Comfort Food Season
Kitchen organization becomes even more important during winter when you’re spending more time cooking comfort foods and holiday meals.
Start with your refrigerator. Remove everything. Wipe down shelves and drawers. Check expiration dates and toss anything questionable. A clean fridge runs more efficiently and makes meal prep easier.
Your oven gets a workout during colder months, so give it a thorough cleaning now. Same goes for your stovetop, including those often-neglected drip pans and burner grates. Clean your dishwasher by running a cycle with a dishwasher cleaner to remove buildup and odors.
Organize your pantry with winter cooking in mind. Group baking supplies together for holiday cooking. Make sure you have adequate storage for root vegetables and other winter staples. Check that your kitchen exhaust fan works properly since you’ll need good ventilation during winter cooking sessions.
Bedrooms: Sleep Sanctuary Setup
Bedrooms need attention before you switch to winter bedding. Wash all your summer sheets and blankets before storing them away. Flip and vacuum your mattress. Consider using a mattress protector if you don’t already have one.
Clean out closets thoroughly as you transition from summer to winter wardrobes. Vacuum closet floors, wipe down shelves, and consider adding cedar blocks or lavender sachets to keep things fresh during the months ahead. This preparation makes the actual clothing transition much smoother.
Wash curtains or blinds, and clean windows inside and out while the weather’s still mild. Clean windows actually help with passive solar heating during the winter months by letting more sunlight through.
Bathrooms: Moisture Management Zone
Bathrooms face unique challenges in winter with increased moisture from hot showers in cold air. Scrub grout and caulking to remove any mildew before it becomes a bigger problem. If you notice failing caulk around the tub or shower, replace it now. Fresh caulk takes 24 hours to cure. Better to do this in mild weather than during a cold snap.
Deep clean exhaust fans, which become critical in winter for managing moisture. Remove the cover and vacuum out dust buildup. A clean fan works more efficiently to remove humid air and prevent mold growth. Test it to make sure it’s actually pulling air.
Check under sinks for any signs of leaks or water damage. Winter’s not when you want to discover a slow leak that’s been causing problems. Make sure cabinet interiors are clean and dry.
Basement and Attic: The Forgotten Zones
Basement organization tackles one of the most neglected areas of winter preparation. These spaces often house your HVAC system, water heater, and other critical equipment, so they need attention.
Start by decluttering ruthlessly. Be honest about what you’re actually going to use versus what’s just taking up space. Donate, sell, or trash anything you haven’t touched in two years.
Sweep or vacuum thoroughly, checking for signs of moisture, pests, or cracks in the foundation. Address any moisture issues before winter, when they can worsen. Clean around your furnace and water heater, removing any combustible materials stored too close to these appliances.
Inspect attic insulation and look for any signs of roof leaks, animal intrusion, or inadequate ventilation. While you’re up there, make sure insulation hasn’t been compressed or pushed aside around soffits where it could block ventilation.
Don’t Forget These Often-Missed Areas
Some spots slip through the cracks during regular cleaning, but matter tremendously for winter air quality.
| Area | Cleaning Instructions |
|---|---|
| Air vents and ductwork | Remove vent covers and vacuum inside the ducts as far as you can reach. Wipe down the covers before replacing them. This prevents months of blowing dust into your living spaces. |
| Ceiling fans | Even though you won’t use them for cooling, reverse them to clockwise rotation on low speed for winter. Clean the blades first so you’re not just circulating dust. |
| Window tracks and sills | Clean these thoroughly and check weatherstripping while you’re at it. Dirt and moisture trapped here lead to mold and drafts. |
| Light fixtures | Dust collects on these and becomes more noticeable during long winter evenings when you’re using lights more. Quick wipe-down makes a difference. |
| Garage and storage areas | These spaces often house seasonal items you’ll need to access during winter. A clean, organized garage makes it easier to find snow shovels, ice melt, and other winter necessities when you need them quickly. |
Storing Summer Clothes and Seasonal Items Properly

How to Store Summer Clothes for Winter
The way you store summer clothes determines their condition when warm weather returns. Never store dirty clothes. Even if something looks clean, body oils, perspiration, and invisible stains attract pests and cause yellowing during storage. Wash or dry-clean everything first.
| Storage Tip | Best Practices |
|---|---|
| Container Choices Matter | Plastic bins with tight-fitting lids protect against moisture and pests better than cardboard boxes. Look for clear bins so you can see contents without opening them. Cost runs $8-20 per bin, depending on size. Natural fibers like wool and silk need to breathe, so consider cotton storage bags for delicate items. Avoid dry cleaning bags for long-term storage since they trap moisture. |
| Folding vs. Hanging | Fold knits and looser garments. Hanging stretches them out over time. Hang items that wrinkle easily, like dress shirts and dresses. If hanging clothes, use padded or wooden hangers that won’t leave shoulder bumps. Cover hanging items with breathable garment bags rather than plastic. |
| Pest Protection | Add protection against moths and other pests. Cedar blocks work well, as do lavender sachets. Skip mothballs. They smell terrible and contain potentially harmful chemicals. Make sure clothes are completely dry before storing, since any moisture promotes mildew growth. |
| Labeling System | Label everything clearly. Future You will appreciate knowing exactly where those favorite shorts are without digging through multiple containers. Include the season and general contents on each label. “Summer – Tank Tops & Shorts” beats “Clothes Box 3.” |
| Climate Considerations | Think about where you’re storing clothes. Basements can be damp. Attics get extremely hot in summer, especially in warmer climates. Garages experience temperature swings. If your home doesn’t have ideal storage conditions, climate-controlled storage protects your wardrobe investment by maintaining consistent temperature and humidity levels. Beats replacing ruined clothes every year. |
What Else to Store Away for Winter
Summer extends beyond just clothes. Outdoor furniture, garden tools, sports equipment, and decorative items all need proper storage, too.
Outdoor Furniture
Scrub away dirt, mildew, and pollen. Let everything dry completely. Remove cushions and store them separately in waterproof containers or bags. If you have space constraints, storing patio furniture in a storage unit protects your investment better than leaving it exposed to winter weather.
Leaving furniture outside costs you. Snow and ice damage finishes. Moisture causes rust and mold. Cushion fabric deteriorates. Proper storage extends the life of your outdoor furniture significantly.
Garden Tools and Equipment
Clean dirt off shovels and hoes. Sharpen blades on pruners and shears. Wipe down metal parts with an oily rag to prevent rust. Drain fuel from gas-powered equipment or add stabilizer. Coil hoses and store them indoors to prevent cracking.
Summer Sports Equipment
Bikes, kayaks, camping gear, and pool accessories all need winter homes. Clean everything thoroughly and make any necessary repairs now rather than discovering problems next spring.
Pool chemicals need special attention since they can be hazardous if stored improperly. Keep them in a cool, dry place away from other chemicals. Never store pool chemicals inside your home.
Lawn Care Equipment
Drain gas from mowers or fill the tank and add fuel stabilizer. Change the oil if needed. Remove the battery from riding mowers and store it indoors on a trickle charger. Clean the deck thoroughly to prevent rust and buildup.
Summer Décor and Linens
Outdoor decorations, light summer blankets, beach towels, and seasonal throw pillows all need storage. Clean everything first and make sure it’s completely dry. Pack similar items together so you can find what you need easily come spring.
Storage Solutions: Keep It Home or Rent a Unit?
Deciding between home storage and renting a unit depends on several factors. Take an honest look at your available space. If you’re already cramped, forcing summer items into overstuffed closets and garages creates stress and makes it hard to access things you actually need during winter.
Organizing a small living room or other main living spaces improves your daily life during winter months when you’re spending more time indoors. Sometimes removing seasonal items completely transforms your home’s functionality.
Storage units make sense when you have bulky summer equipment like boats, jet skis, or extensive patio furniture sets. These items take up garage space you might need for parking when snow flies. Climate-controlled units particularly benefit clothes, electronics, photographs, and anything sensitive to temperature or humidity fluctuations.
Cost Comparison
Calculate the value of your stored items against rental costs. A 5×10 unit typically runs $50-100/month. A 10×10 runs $100-150/month. Compare that to replacing ruined furniture or clothes.
Consider the convenience factor, too. Having easier access to daily-use items in your home often outweighs the cost of storing seasonal items elsewhere.
Deciding between long-term and short-term storage depends on your situation. If you face this storage crunch every year, a long-term solution might make more sense than repeatedly packing and unpacking.
Preparing Your Home’s Exterior for Winter
Roof and Gutters: Your First Line of Defense
Your roof is your home’s first defense against winter weather. Inspect it carefully before cold weather arrives. Look for missing, damaged, or curling shingles. Check flashing around chimneys, vents, and skylights where leaks commonly develop. If you’re not comfortable on a ladder, hire a professional for inspection and repairs. Cost runs $150-300 for inspection.
Gutter Reality
Your gutters are probably full of decomposing leaf soup right now. Yes, cleaning them sucks. Yes, you still have to do it.
Clogged gutters cause water backup that damages your roof, siding, and foundation. One ice dam can cause thousands in damage. One foundation crack from poor drainage? Even worse.
How to actually do this (2-3 hours for the average home):
- Get a sturdy ladder. Seriously sturdy. Don’t be the person who ends up in the ER.
- Scoop out leaves with your hands or a gutter scoop
- Flush with a hose
- If water pools instead of flowing, you’ve got a downspout clog
- Snake it out with a plumber’s auger or disassemble the elbow joint at the bottom
| Cost to DIY | Cost to Hire | Cost of Ignoring It |
|---|---|---|
| $0 plus 2-3 hours of your life | $150-300 | $1,000-5,000+ in damage |
Check that downspouts direct water at least five feet away from your foundation. Add extensions if needed. $10-20 at the hardware store beats foundation repair.
While you’re up there, look at your attic from inside. Check insulation levels and look for any light coming through, which means gaps where cold air can enter. Proper attic ventilation prevents ice dams, those ridges of ice that form at roof edges and cause water to back up under shingles.
Trim back tree branches hanging over your roof. Heavy snow or ice can bring down branches, damaging your roof, gutters, or siding. Dead branches pose particular risks. Consider having a professional arborist handle large trees or dangerous limbs.
Windows and Doors: Seal the Leaks
Heat gain and loss through windows accounts for 25-30% of residential heating and cooling energy use. Weatherproofing these areas is high-impact work.
Weatherstripping Check (1 hour for whole house)
Check weatherstripping around all doors and windows. It should compress slightly when the door or window closes, but not be so compressed that it’s flattened. Replace worn or damaged weatherstripping.
Dollar bill test: Close the door on a dollar bill. Can you pull it out? Weatherstripping is shot. This simple fix costs $5-10 per door but saves substantially on heating bills.
Caulking (2-3 hours for the whole house)
Apply caulk to any gaps or cracks around window frames, door frames, and anywhere different materials meet on your home’s exterior. Choose a caulk rated for exterior use and temperature fluctuations. One tube of caulk costs $3-6 and can seal several windows.
Look for gaps where:
- Window or door frames meet siding
- Different siding materials meet
- Pipes or wires enter your home
- Foundation meets siding
Storm Windows and Plastic Film
Storm windows or plastic film insulation kits provide an extra layer of protection for single-pane windows. Plastic film isn’t the most attractive option, but it’s inexpensive ($10-20 per window kit) and effective. Apply it carefully, following package directions for best results.
Check door sweeps at the bottom of exterior doors. These should create a seal with your threshold without making the door hard to open and close. Replace any that are damaged or too worn to seal properly. Cost runs $10-25 per door sweep.
Outdoor Spaces: Winterize Everything
| Items | Duration | Details |
|---|---|---|
| Garden Hoses | 15 minutes | Disconnect them from exterior faucets. Drain them completely. Store them indoors or in a shed. Water left in hoses can freeze and expand back into the faucet, causing pipes to burst inside your walls. Not fun. Not cheap to fix. |
| Exterior Water Valves | 30 minutes | Shut off exterior water valves from inside your home if possible. Open the outside faucet to drain any remaining water. Leave it open through winter to prevent pressure buildup if any water does freeze in the line. |
| Outdoor Furniture | 1–2 hours | Cover pieces with weatherproof covers designed for outdoor use. Bring cushions indoors. If you’re tight on space for storing patio furniture through winter, a storage unit keeps these items in better condition than leaving them exposed to snow and ice. |
| Plants and Shrubs | Varies | Protect plants and shrubs that are borderline hardy in your zone. Wrap young trees in burlap. Mulch heavily around the base of perennials and shrubs. Bring potted plants indoors or into a protected garage. Drain and store or cover fountains and decorative water features. |
| Grill Winterization | 30 minutes | Clean it thoroughly, removing grease and food residue that attracts pests. If it runs on propane, you can safely leave the tank connected outdoors but turn it off. Natural gas grills should have their gas lines blown out. Cover the grill with a weatherproof cover. |
| Air Conditioning Units | Varies | Remove window AC units and store them indoors if possible. For central air systems, cover the exterior condenser unit with a breathable cover or a piece of plywood weighted down on top. Don’t wrap it completely in plastic since condensation needs to escape. |
Interior Winter Preparation Tasks
Heating System Maintenance: Don’t Skip This
Your furnace is like your car. Ignore maintenance and it’ll quit on you at the worst possible moment. Except when your furnace dies, you can’t just call an Uber. You freeze in your own house while paying for an emergency repair that costs triple the normal rate.
| Task | Details |
|---|---|
| Professional Inspection ($80-150, takes 1 hour) | Schedule this before heating season begins. A technician will check for carbon monoxide leaks, test the heat exchanger, measure airflow, and clean components. Catch potential problems before they become emergencies. Skip this and you’re gambling with your heating system’s life. Not a fun bet to lose at 2am when it’s 15 degrees outside. |
| Filter Changes (10 minutes, $5-15 per filter) | Change your furnace filter before winter starts, then check it monthly throughout the heating season. A clogged filter makes your system work harder, wastes energy, and circulates dust through your home. Buy several filters at once so you have them on hand. |
| Thermostat Testing | Test your thermostat to ensure it’s working correctly. If you have a programmable thermostat, review your settings. Programming your thermostat to lower temperatures when you’re asleep or away can cut heating costs by 10-15%. That $200 programmable thermostat everyone raves about? Skip it if you have a consistent schedule. A $20 basic programmable does the same job. Set it back 7-10 degrees when you’re asleep or away. That’s 10% off your heating bill for the price of a pizza. |
| Radiator Bleeding | If you have radiators, bleed them to release trapped air that prevents proper heating. You’ll know they need bleeding if the top feels cooler than the bottom. Turn on the heat, wait for the radiators to warm, then use a radiator key to open the bleed valve until water comes out. This simple task improves heating efficiency significantly. |
| Vent Obstructions | Check around heating vents and registers for obstructions. Furniture, curtains, or storage boxes blocking vents waste energy and create uneven heating. Make sure all vents in occupied rooms are open. You can close vents in unused rooms, but don’t close too many since this can strain your HVAC system. |
Plumbing Protection: Prevent the $11,000 Disaster
Frozen pipes cause catastrophic damage, but prevention is straightforward.
| Task | Details |
|---|---|
| Pipe Insulation (1-2 hours, $20-40 in materials) | Insulate exposed pipes in unheated areas like basements, crawl spaces, attics, and garages. Foam pipe insulation from hardware stores costs $2-3 per 6-foot section. Installation is simple: cut to length, slit lengthwise, and slip over pipes. Repairing one burst pipe costs $5,000-$11,000. Insulating all your vulnerable pipes costs $20-40. Do the math. |
| Main Water Shut-Off | Know where your main water shut-off valve is located. Make sure everyone in your household knows too. In an emergency, shutting off water quickly minimizes damage. Test the valve now to ensure it’s not stuck from lack of use. |
| Outdoor Faucet Prep | Drain outdoor faucets and sprinkler systems. Any water left in these lines can freeze and cause expensive damage. If you have an irrigation system, hire a professional to blow out the lines properly. Cost runs $50-100. |
| Water Heater Settings | Set your water heater temperature to 120 degrees Fahrenheit. This temperature prevents scalding, reduces energy costs, and is hot enough for most household needs. While you’re checking your water heater, look for any signs of leaks or rust. A failing water heater gives warning signs before it floods your basement. |
| Sump Pump Test | Test your sump pump if you have one. Pour a bucket of water into the sump pit. The pump should activate quickly, remove the water, and shut off automatically. A failed sump pump during winter thaws can flood your basement. |
Safety Preparations: The Non-Negotiables
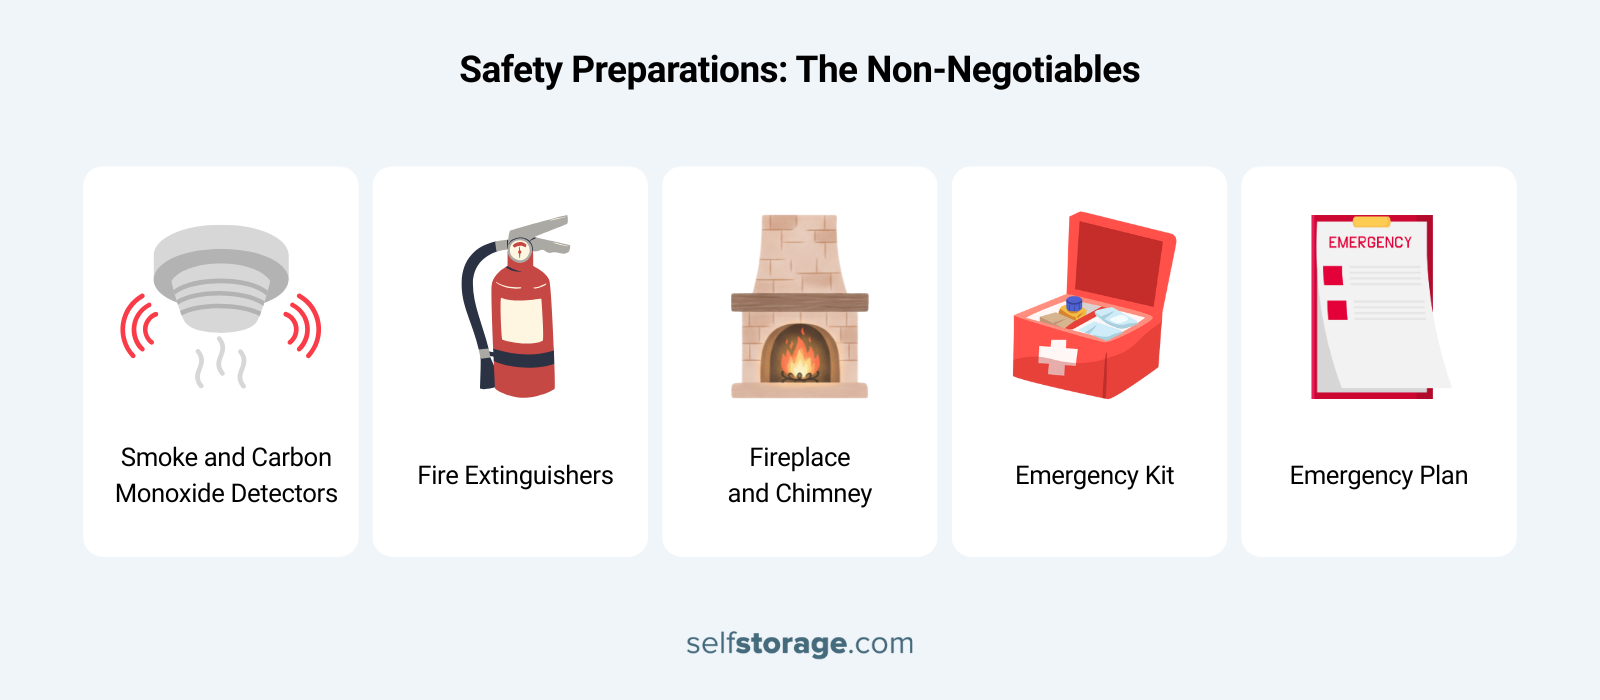
Smoke and Carbon Monoxide Detectors
Test all smoke detectors and carbon monoxide detectors. Replace batteries even if they seem fine. These devices have a limited lifespan, typically 7-10 years. Check manufacturing dates and replace old units.
Carbon monoxide from a poorly maintained furnace will literally kill you. Dead serious. Test those detectors.
Fire Extinguishers
Inspect fire extinguishers. Check the pressure gauge to ensure it’s in the green zone. Make sure everyone knows where extinguishers are located and how to use them. If you don’t have extinguishers on every level of your home, buy them. Cost runs $20-50 each.
Fireplace and Chimney
If you have a fireplace or wood stove, have the chimney professionally inspected and cleaned. The Chimney Safety Institute of America recommends annual inspections. Creosote buildup causes chimney fires, and blockages from bird nests or debris can lead to dangerous carbon monoxide buildup. Cost runs $125-250.
If your furnace sounds like it’s summoning demons when it kicks on, that’s not normal. Call someone.
Emergency Kit
Create or update your winter emergency kit. Include:
- Flashlights and batteries
- Battery-powered radio
- First aid supplies
- Non-perishable food (enough for 3-5 days)
- Water (1 gallon per person per day)
- Medications
- Warm blankets
- Ice melt
- Snow brush
- Hand warmers
Emergency Plan
Review your family’s winter emergency plan. What happens if the power goes out? Where will you shelter if the heat fails? Do you have alternative heating sources? Having a plan reduces panic during actual emergencies.
Organizing Your Home for the Winter Season
Winter organization differs from other seasons because you need different items readily accessible.
Coat Closet and Mudroom Setup
Move winter coats, boots, hats, and gloves to prime real estate in your coat closet or mudroom. Store spring jackets and light sweaters farther back or in bins.
Create a functional boot and wet gear station near your main entrance. Include a boot tray or mat to catch snow and water, hooks for hanging wet coats and scarves, and a basket for hats and gloves. This contained system keeps melting snow from tracking through your entire house.
Closet Reorganization
Reorganize closets with winter access in mind. Heavy sweaters, thermal layers, and winter accessories should be easy to reach. If you’re working with limited closet space in a small home, consider ways to organize a small living room that incorporate seasonal storage solutions.
Winter Sports Equipment
If you ski, snowboard, or ice skate, designate specific areas for this gear. Clean and maintain equipment now rather than rushing before the first snow. Store frequently used items like sleds where kids can access them easily.
Kitchen Reorganization
Your kitchen might need reorganizing for winter cooking patterns. Baking supplies move to the front during the holiday season. Soup pots and slow cookers see more use. Hot chocolate supplies and tea selections expand. Organizing your pantry for winter means thinking about the foods you’ll actually cook during cold months.
Creating Additional Storage Space at Home
When seasonal transitions strain your storage capacity, creative solutions help maximize every square inch.
| Strategy | Details |
|---|---|
| Under-Bed Storage | Low-profile bins slide easily under most beds and keep summer clothes or extra blankets clean and accessible. This is a hugely underutilized space in most homes. |
| Maximize Closet Vertical Space | Add double hanging rods, shelf dividers, and stackable bins. Most closets have wasted space above the single hanging rod. Adding a second rod below the first doubles your hanging capacity for shorter items like shirts and pants. |
| Repurpose Unused Areas | Look for spots that could serve storage purposes. The space above kitchen cabinets can hold rarely used items. Walls can accommodate shelving units. Even the backs of doors work for hanging organizers. |
| Garage and Basement Shelving | Wall-mounted shelving systems benefit tremendously from getting items off the floor. This protects them from moisture and makes it easier to sweep and organize. Overhead garage storage racks utilize space that typically sits empty. |
| Vacuum Storage Bags | These compress bulky items like winter bedding and puffy coats by up to 80%. They work great for items you won’t need to access frequently. Don’t use them for leather, fur, or delicate fabrics that can be damaged by compression. |
| When It’s Time for a Storage Unit | Sometimes the best solution for creating space at home is removing items entirely. When your home’s storage truly reaches capacity, climate-controlled storage units offer a practical extension of your living space. |
Kayaks, bikes, camping gear, AND lawn equipment? Yeah, your garage isn’t Mary Poppins’ bag. Let’s be realistic about space.
Month-by-Month Winter Home Maintenance
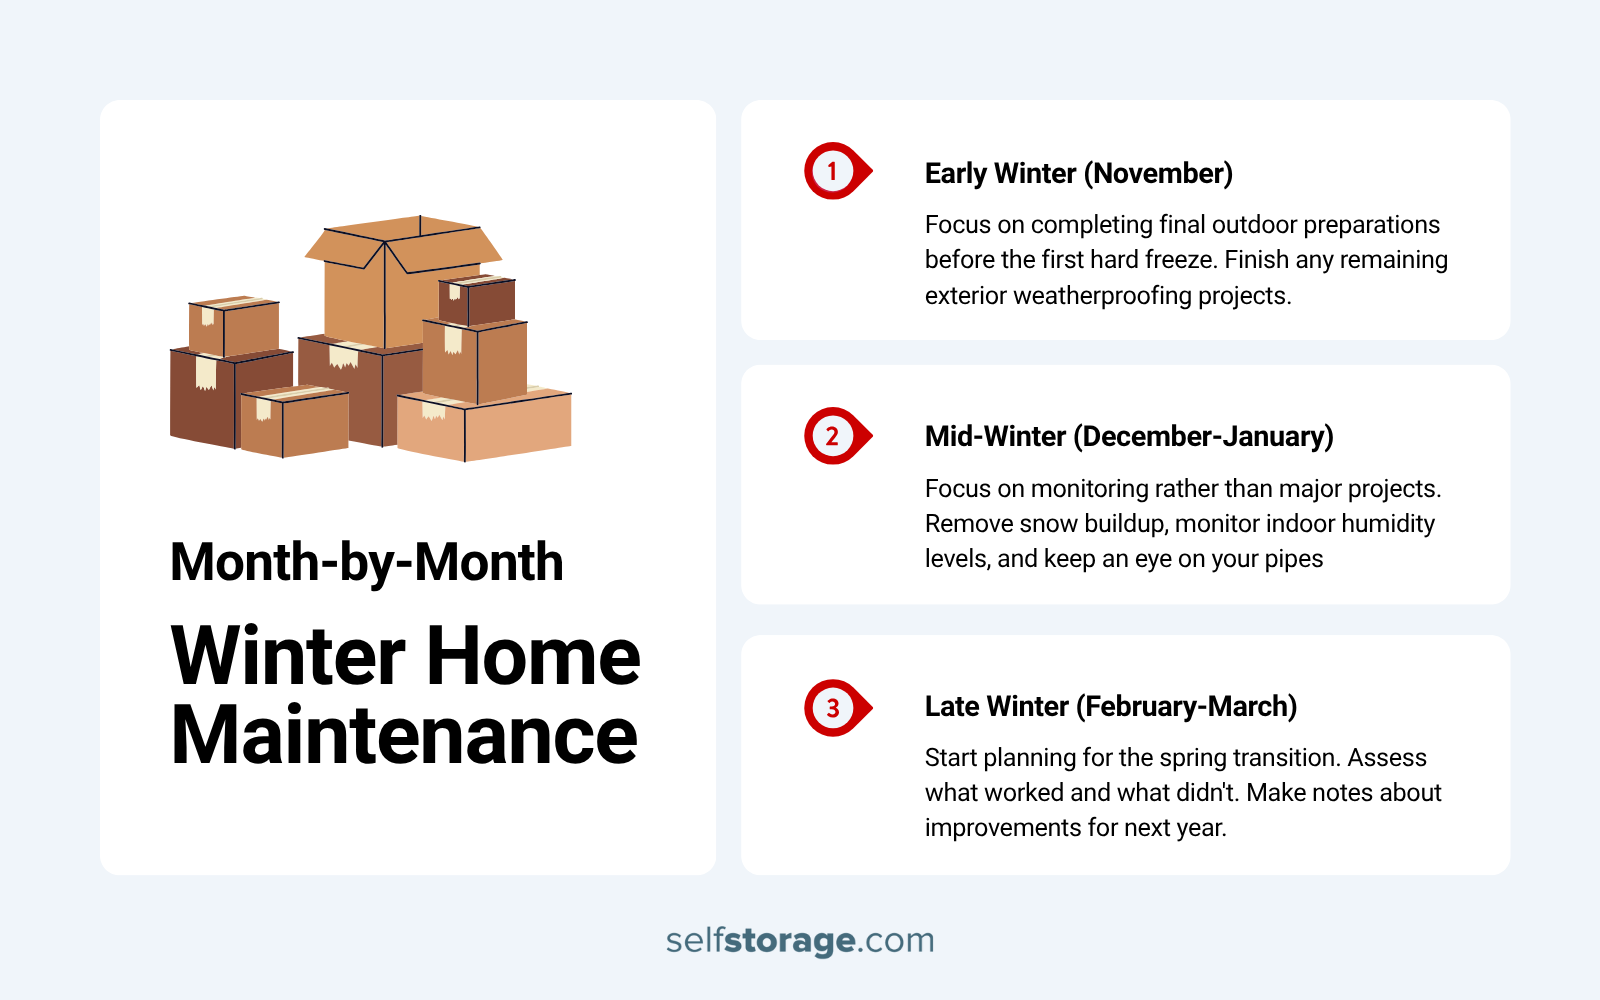
Early Winter (November): Final Preparations
November focuses on completing final outdoor preparations before the first hard freeze. Finish any remaining exterior weatherproofing projects. Complete your heating system maintenance and safety checks. Transition your wardrobe and bring winter items to accessible locations.
Stock up on winter supplies like ice melt, snow shovels, and emergency provisions. Check your snow blower if you have one, making sure it starts and runs properly. Change the oil and spark plug if needed.
Reverse the ceiling fans to clockwise rotation on low speed. This pushes warm air that rises to the ceiling back down into your living space. It’s a small change that improves comfort and can reduce heating costs.
Mid-Winter (December-January): Monitor and Maintain
These coldest months focus on monitoring rather than major projects. Check your roof after heavy snowfalls for ice dam formation. Remove snow buildup if it gets excessive, though be careful about safety if you’re doing this yourself.
Monitor indoor humidity levels. Winter air is naturally dry, and heating it further reduces humidity. Too-dry air causes respiratory irritation, dry skin, and can damage wood furniture and flooring. Consider using humidifiers to maintain comfortable levels between 30-50% humidity.
Check for drafts around windows and doors. If you feel cold air, add temporary weatherstripping or use draft stoppers. Monitor your heating bills. Significant increases might indicate your system isn’t working efficiently.
Keep an eye on your pipes during extreme cold snaps. Let faucets drip slightly during the coldest nights. Open cabinet doors under sinks to allow warm air to circulate pipes. These simple steps prevent frozen pipe disasters.
Late Winter (February-March): Plan Ahead
As winter winds down, start planning for the spring transition. This is a good time to assess what winter storage solutions worked and what didn’t. Make notes about improvements for next year while they’re fresh in your mind.
Watch for ice dams and address them promptly. As temperatures fluctuate between freezing and thawing, ice dams can worsen and cause serious damage. If you get recurring ice dams every year, it indicates insulation or ventilation issues to address before next winter.
Ice dams aren’t fixed from the outside. They’re an attic problem. If you get them every year, your attic insulation or ventilation is inadequate. Chipping away ice is treating the symptom, not the disease.
Begin planning for spring cleaning and the summer storage transition. Think about whether your current storage situation worked or if you need to consider alternatives like a storage unit for next year’s seasonal changeover.
Check outdoor areas as snow melts. Look for any damage that occurred during winter, like broken fence boards, damaged siding, or shifted retaining walls. Making a list now means you can tackle repairs as the weather permits.
Winter Is Coming. Are You Ready?
Look, we know this list is long. We know you’re already busy. We know spending a weekend cleaning gutters instead of watching football sounds terrible.
But winter doesn’t care about your schedule.
That first hard freeze is coming whether you’re ready or not. Spend a few weekends now doing preparation work, or spend a lot more money later dealing with emergencies that could’ve been prevented.
If you’re feeling overwhelmed, pick five things from this list. Just five. Start with the critical tasks from the beginning of this guide. Then add more as you have time.
If space limitations are making winter preparation stressful, finding the right storage solution transforms your seasonal transition. Climate-controlled units protect summer belongings while freeing up space in your home for winter essentials.
Future you, standing in the garage at 6 am during the first snowstorm, trying to find the snow shovel, will either thank present you or curse your name.
Winter is coming. Make sure you’re ready.
Your Complete Winter Prep Checklist
Print this, check boxes, feel accomplished. Aim for 80% completion minimum.